Did you know that you can perform data mapping in Visual Studio Code using a custom XSLT file? It’s a powerful technique that can help you streamline your workflow and make your development process much more efficient. With just a few simple steps, you can set up you’re mapping and get started on your next project in no time!
Follow-up steps:
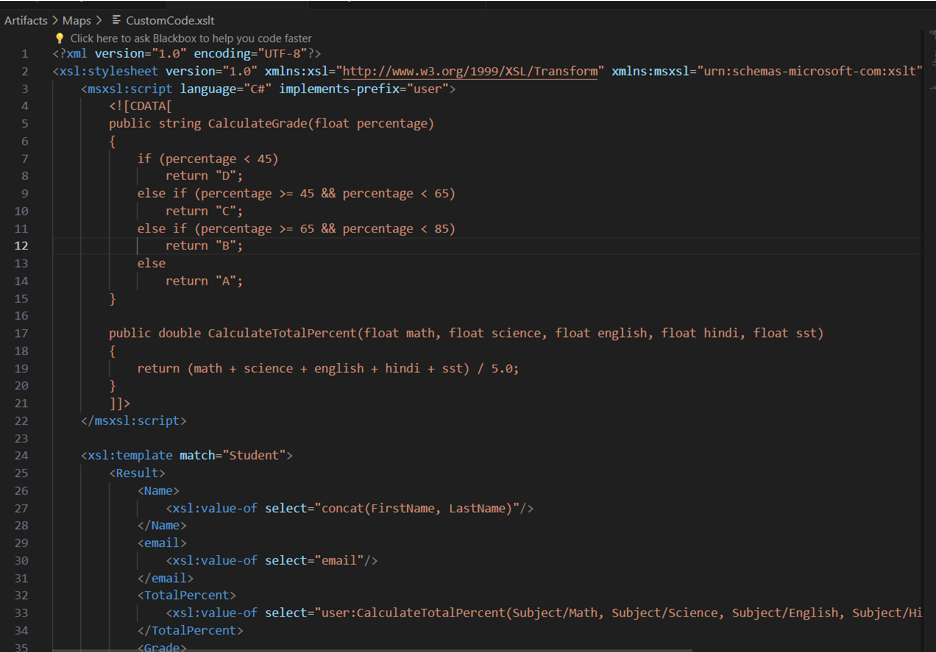
- After generating the MAPS folder in VS code, I created 4 XSLT files. Among these, 3 XSLT files are generated using “The Data Mapper tool” in VS code, while the remaining file, “CustomCode.xslt,” where I have writted C# code in XSLT file:
- All XSLT files are stored in the MAPS folder.

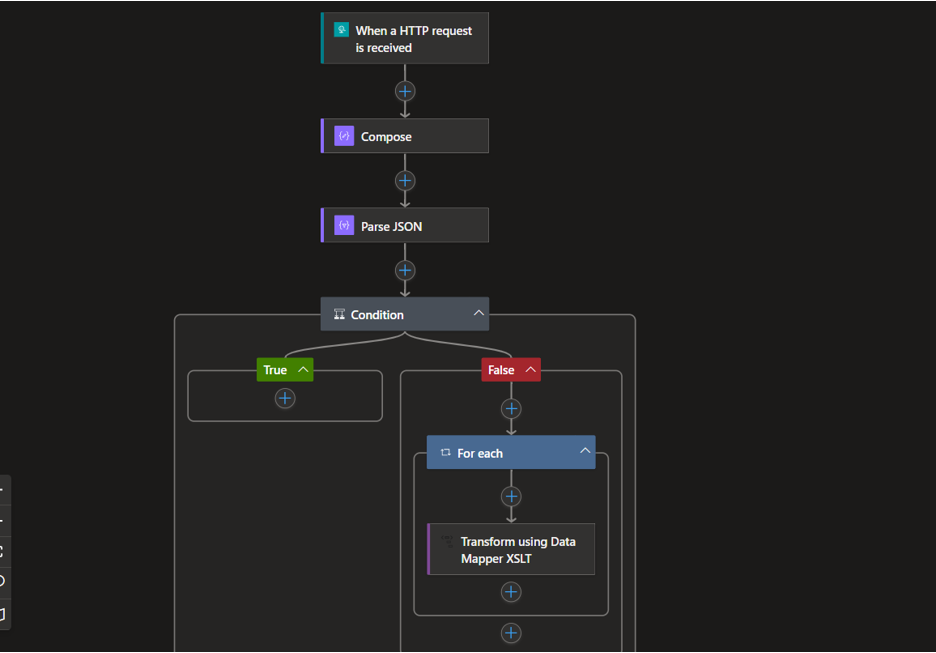
- Afterwards, the workflow design was created.
- Then in the “Compose” action given all the names of XSLT files located in the MAPS folder in the JSON format.

- Then in the Parse JSON action:

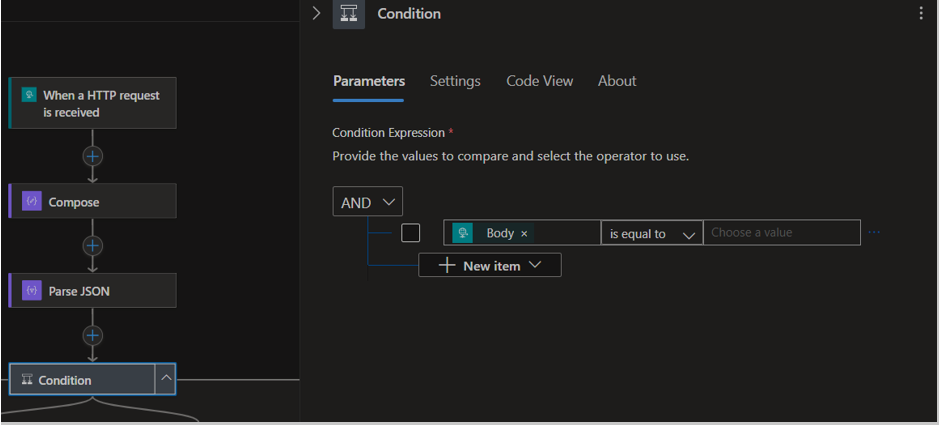
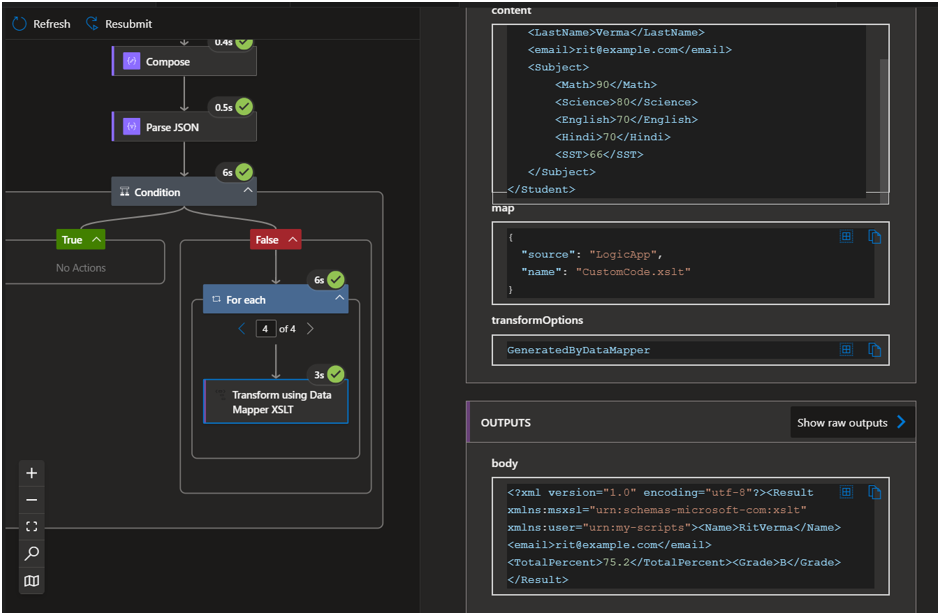
- In the given condition, if the body is empty, it will go to the “True” section. If the body is not empty, it will go to the “False” section.
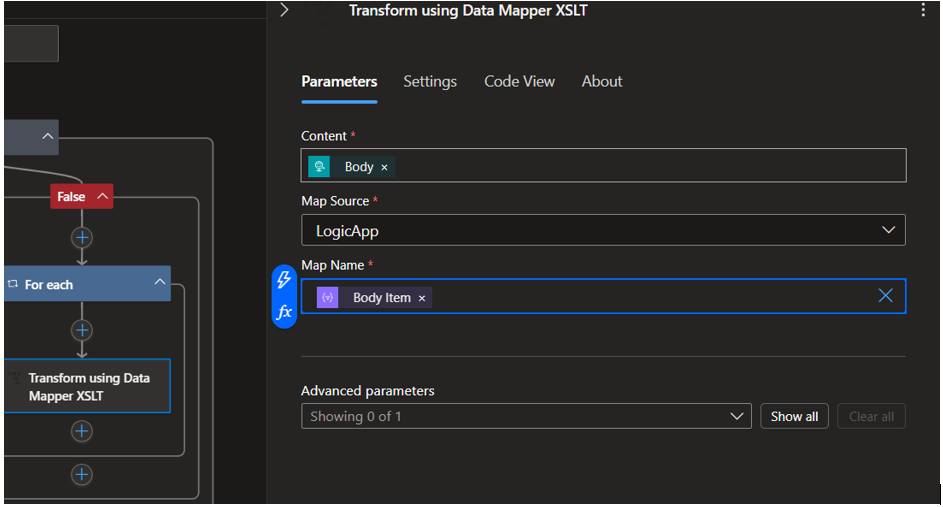
- Then in the action “Transform using Data Mapper XSLT” action given this :
- After triggering the workflow, the data provided in the body will be mapped according to its schema.
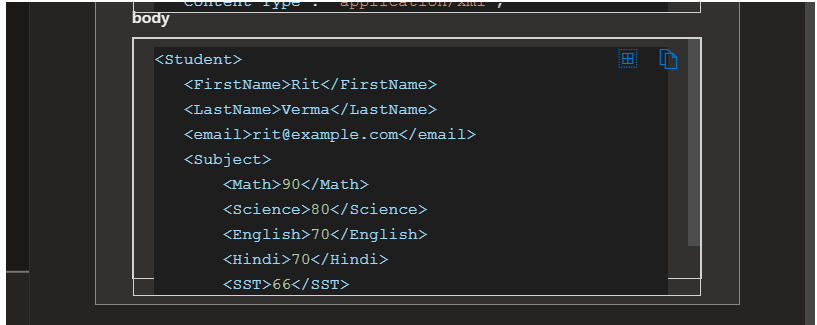
Please find below a sample XML input for your reference.
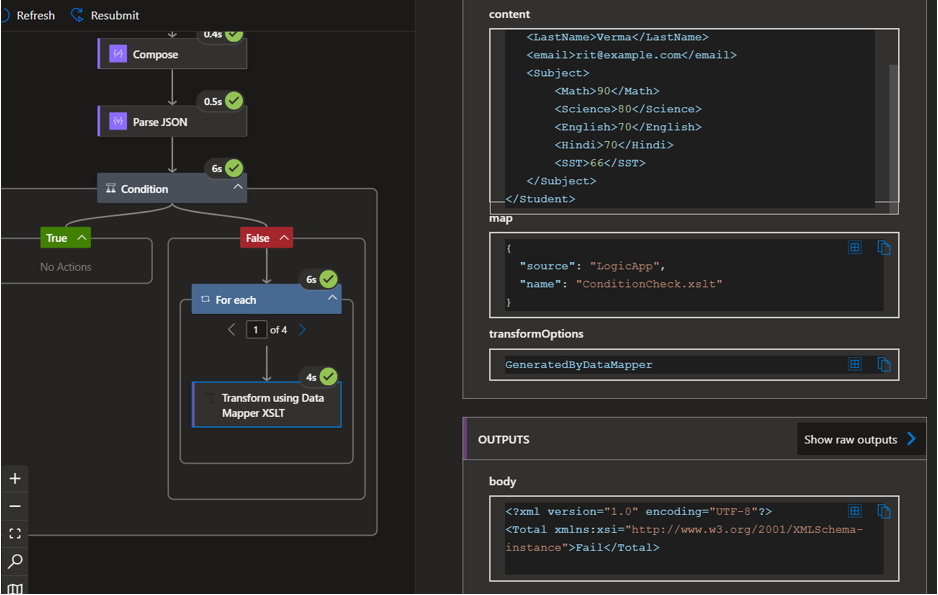
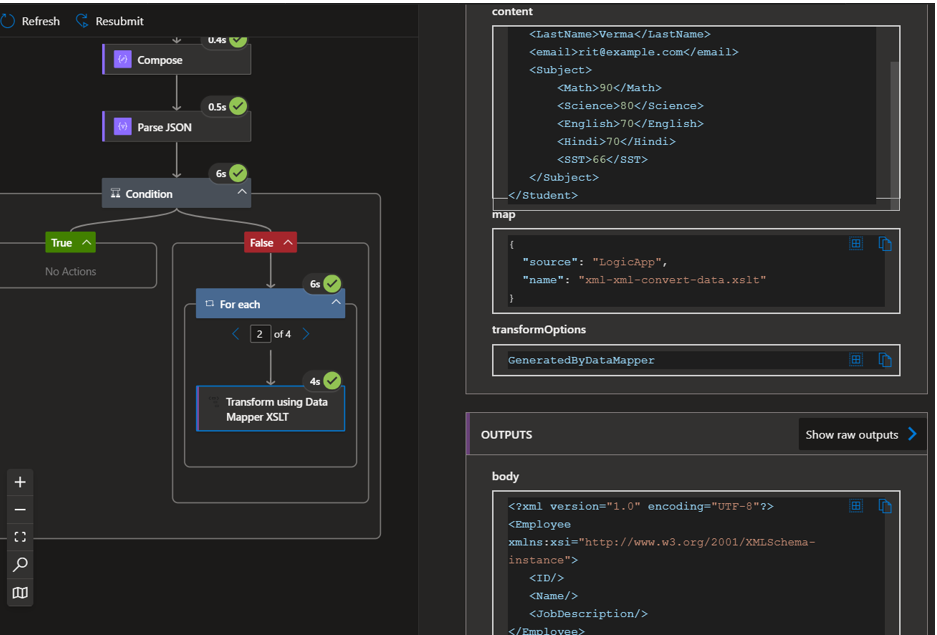
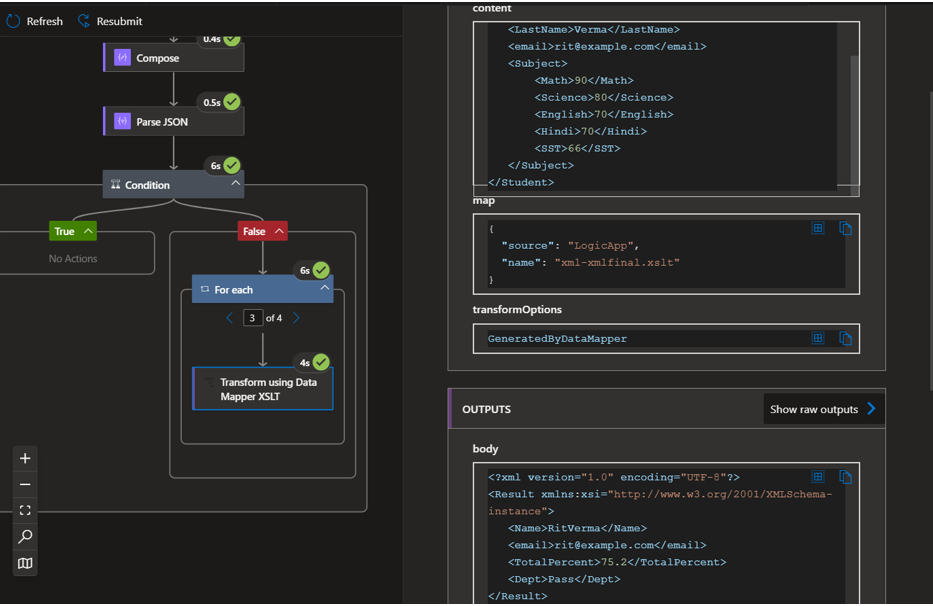
We obtained the following results in the output of the 4 XSLT files:
1.ConditionCheck.xslt :
3. xml-xml-final.xslt :
4. CustomCode.xslt :
Comments
Post a Comment