Hi there! 😊 today let’s learn how to create Logic App step by step.

Azure Logic App is a cloud-based service provided by Microsoft Azure. It allows you to create workflows and automate tasks by connecting various services, applications, and data sources. Here are some key points about Azure Logic App:
- Workflow Automation: Logic Apps enable you to design workflows visually using a drag-and-drop interface. You can define triggers (events that start the workflow) and actions (tasks performed during the workflow).
- Connectivity: Logic Apps integrate seamlessly with other Azure services, SaaS applications (such as Office 365, Salesforce, and Twitter), on-premises systems, and custom APIs.
- Pre-built Connectors: Azure Logic App provides a wide range of pre-built connectors for popular services. These connectors simplify integration and allow you to create powerful workflows without writing extensive code.
- Scalability and Resilience: Logic Apps are highly scalable and can handle large workloads. They also provide built-in error handling and retries.
- Monitoring and Logging: You can monitor the execution of your logic apps, view logs, and set up alerts for specific conditions.
- Security: Logic Apps support authentication and authorization mechanisms, ensuring secure communication between services.
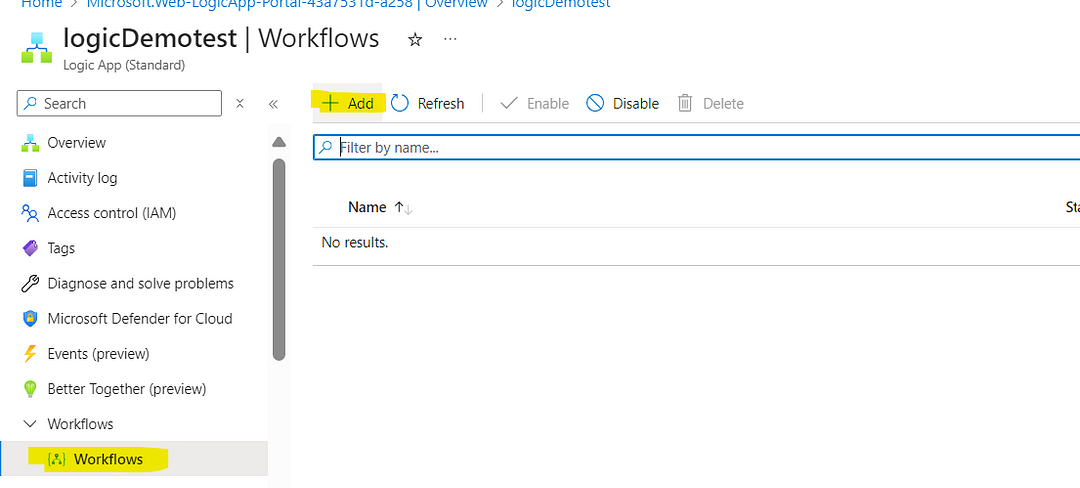
First, open your Azure portal and navigate to the resource named ‘Logic App’. After selecting the Logic App resource, you will see a screen like the one shown below. Click on the ‘Add’ button:

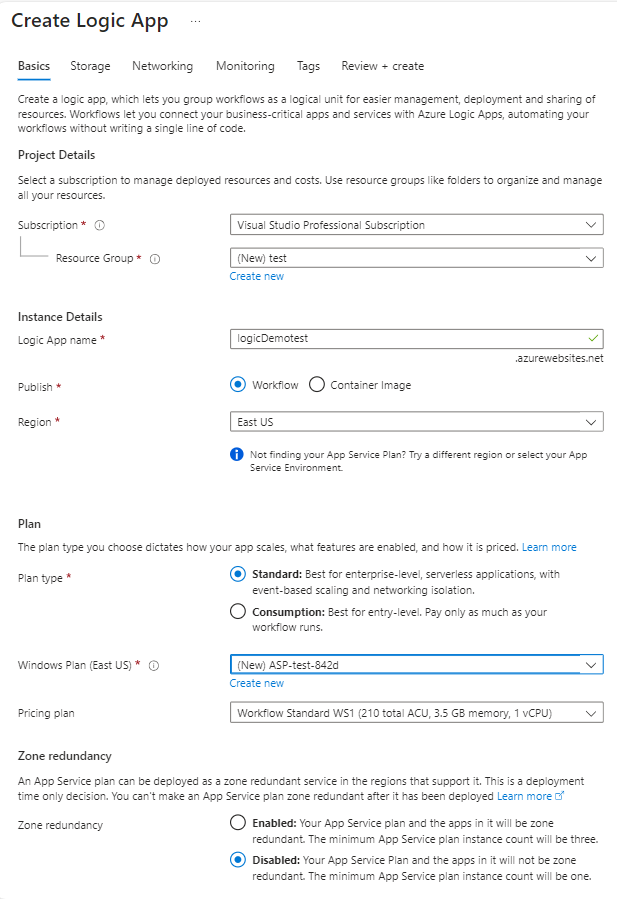
It’s time to fill in the essential details to establish the Logic app:
>STANDARD LOGIC APP :
- Basics section :
Subscription: give your own subscription
Resource Group: Your own Resource group name which you have created or you can also slelect on “create new” and can give whatever resource name you want.
Logic App Name: Give your own Logic app name
Publish : I wanted that my logic app will contain Workflow , It’s upto you
Region: select whatever region you want to give
Plan type: The Plan type property specifies the hosting plan and billing model to use for your logic app. It’s upto you which type of logic app you want to create as per your requirement. Here I will show you both Standard and Consumption logic app how we can create.
Windows Plan : This will create a web app service plan if you choose to create a Standard Logic App. If you already have an existing App Service Plan (ASP), you can select the existing ASP.
Pricing Plan : The pricing tier to use for your logic app and workflows. Your selection affects the pricing, compute, memory, and storage that your logic app and workflows use.
Zero Redundancy : If you select an Azure region that supports availability zone redundancy, the Zone redundancy section is enabled. This section offers the choice to enable availability zone redundancy for your logic app.
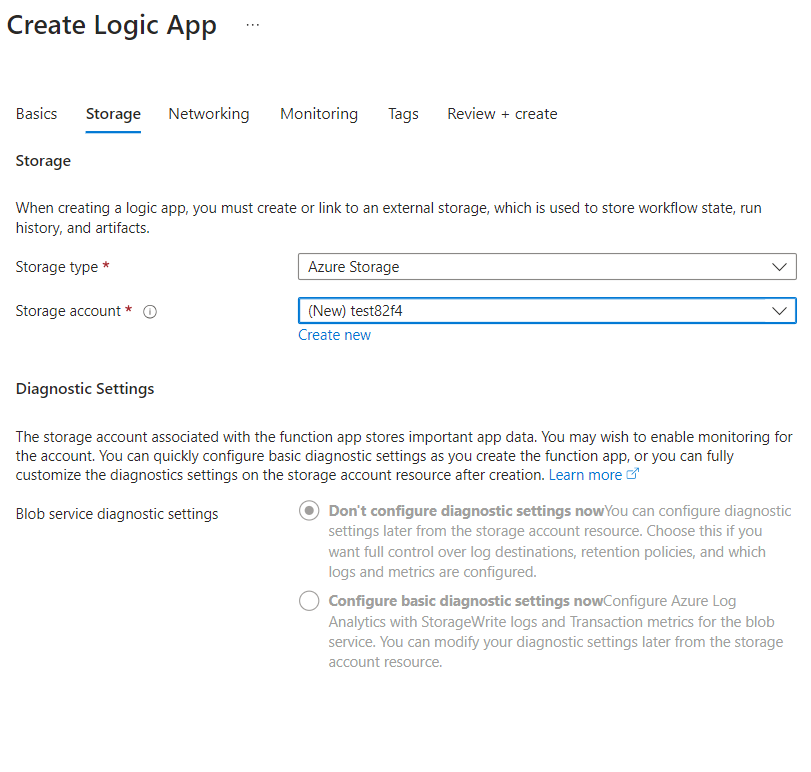
2. Storage section :
Storage type : It’s up to you whatever you can select Storage Type
Storage account : give your own storage account name
3. Networking: On the Networking tab, you can leave the default options for this example.
For your specific, real-world scenarios, make sure to review and select the appropriate options. You can also change this configuration after you deploy your logic app resource.
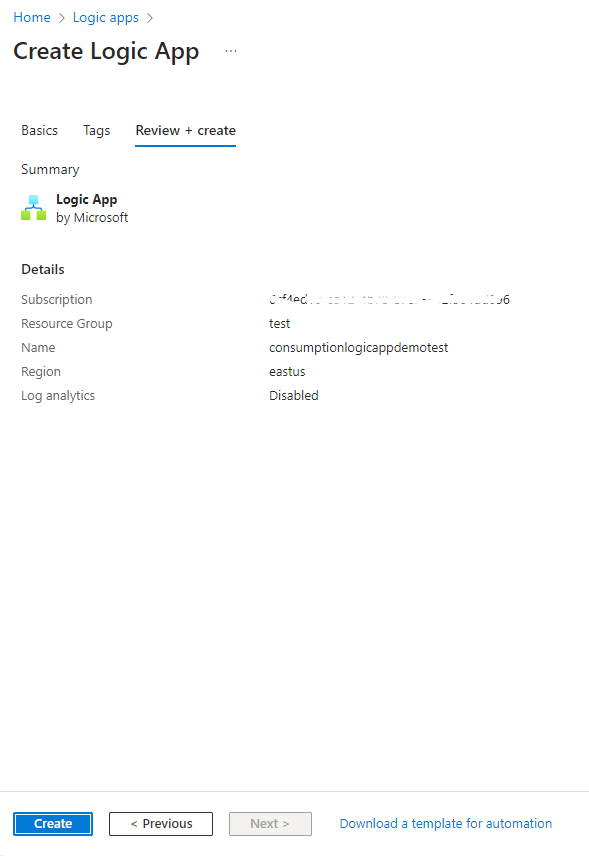
In the ‘Networking’, ‘Monitoring’, and ‘Tags’ sections, I left the settings at their default options and then proceeded to ‘Review + Create’.
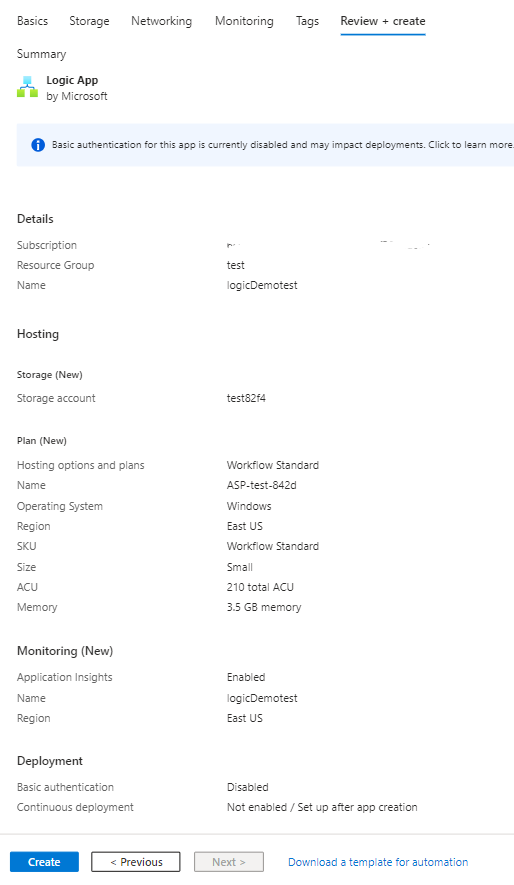
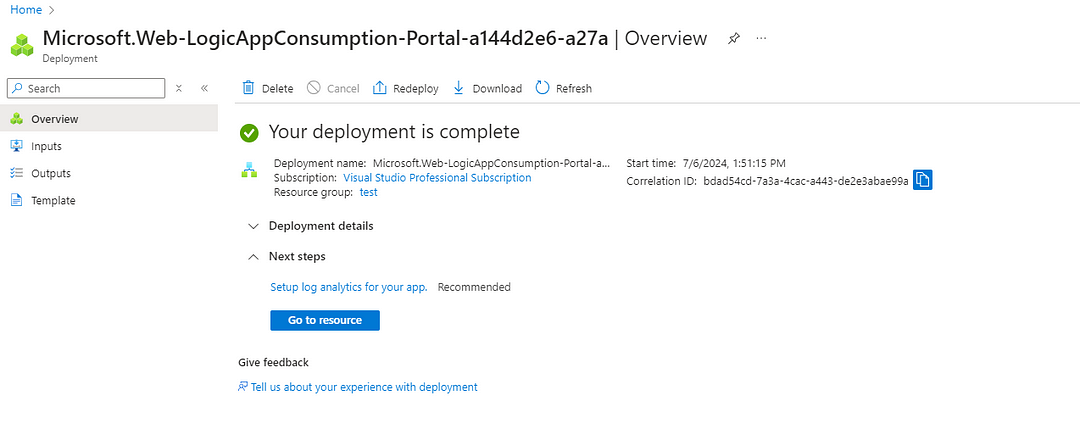
Upon successful deployment, you will see the following:

Now select “Go to resource”. It will take us to Logic app Overview section.
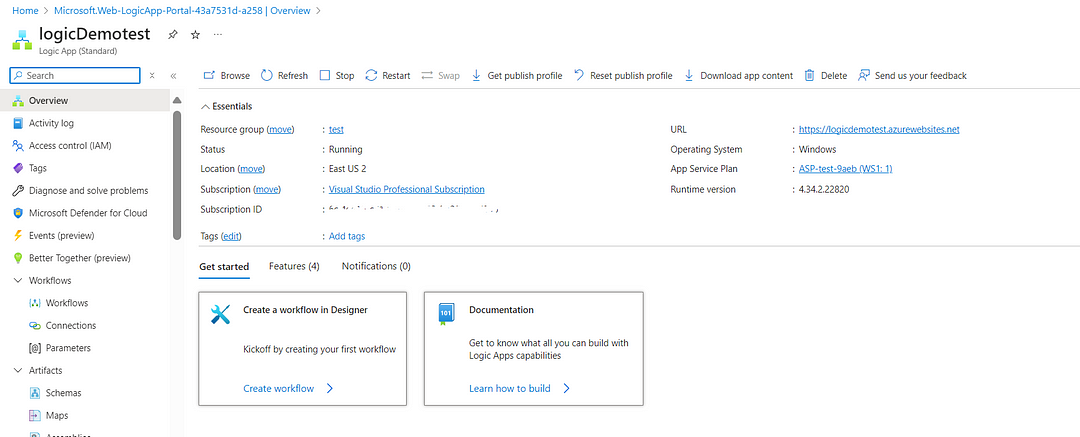
Now this is standard Logic app , so we can create mutiple workflow as many as we want:

Now here I have created two sample workflows:
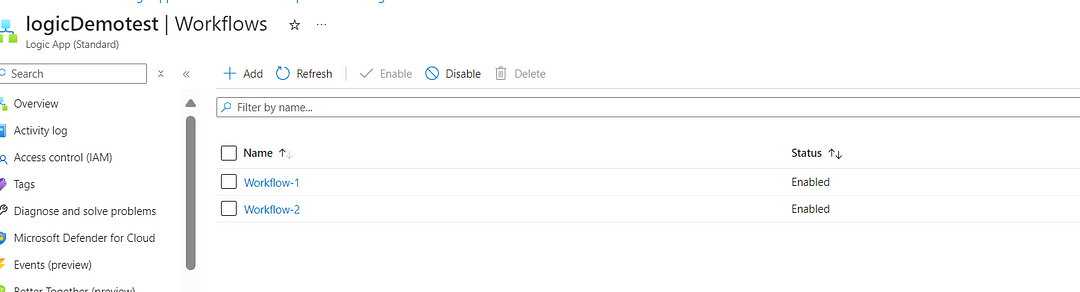
I have created a scenario where ‘Workflow-1’ will automatically trigger ‘Workflow-2’.
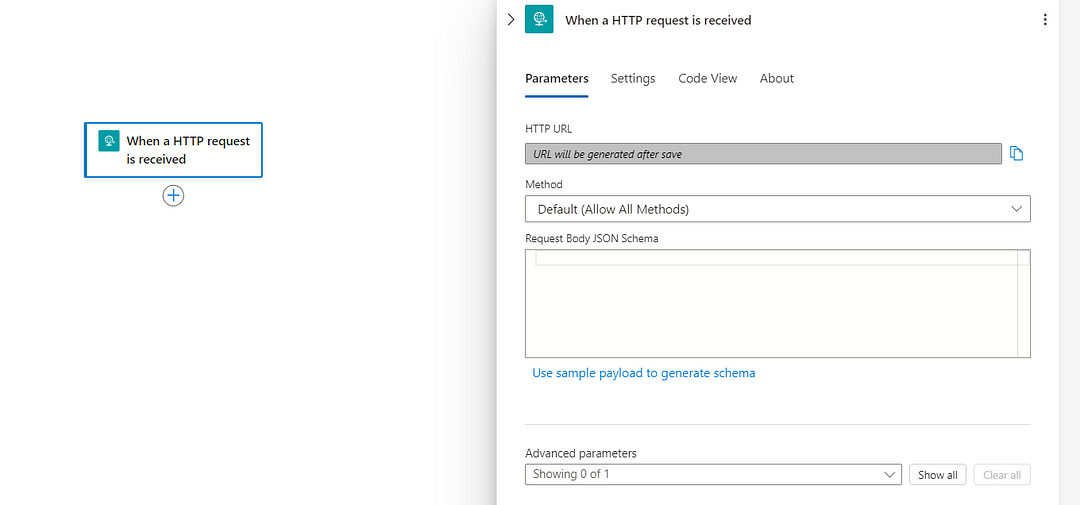
So, I navigated to Workflow-1 and, in the designer section, selected the ‘When an HTTP request is received’ trigger.

Initially, it will appear like this, but once you save the workflow designer, it will generate the URL for the workflow.
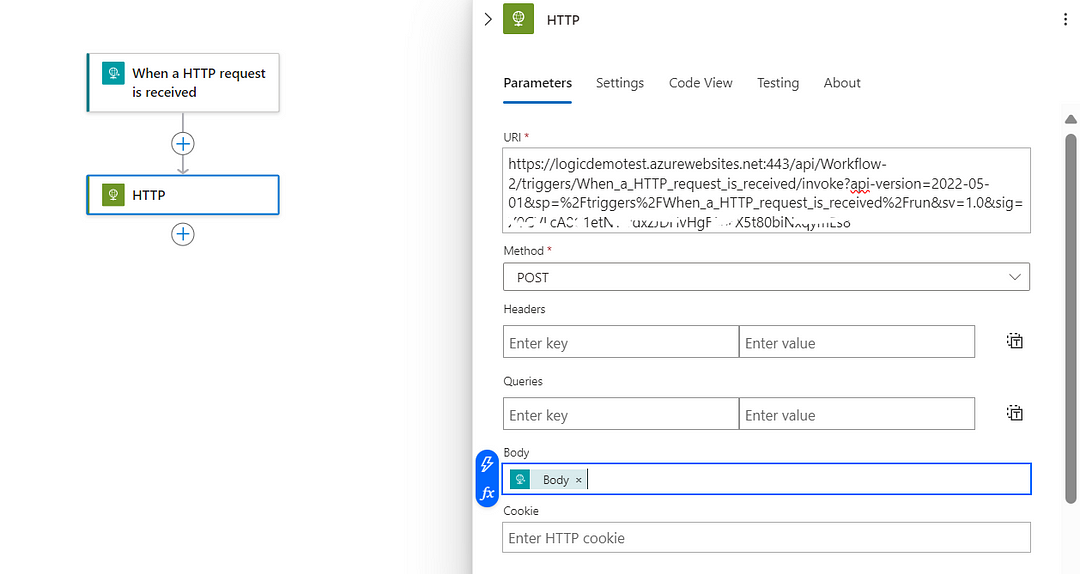
So, now it’s time to set up the action that will trigger Workflow-2 when Workflow-1 runs.
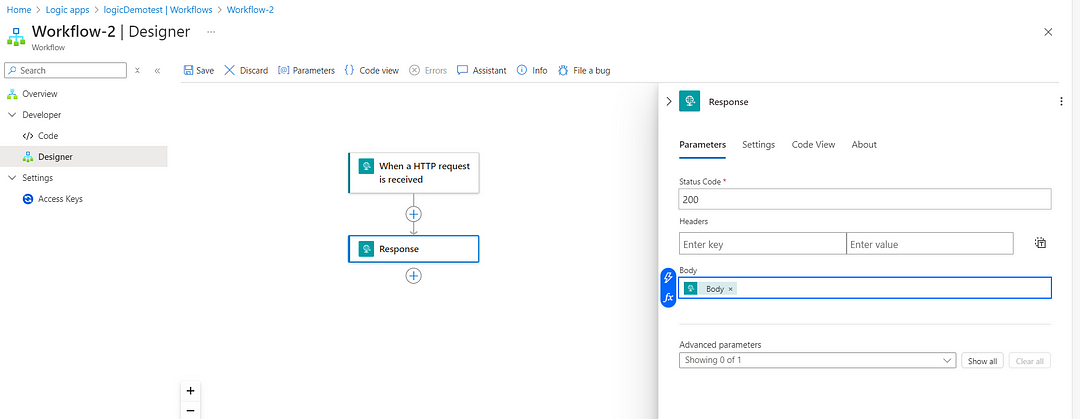
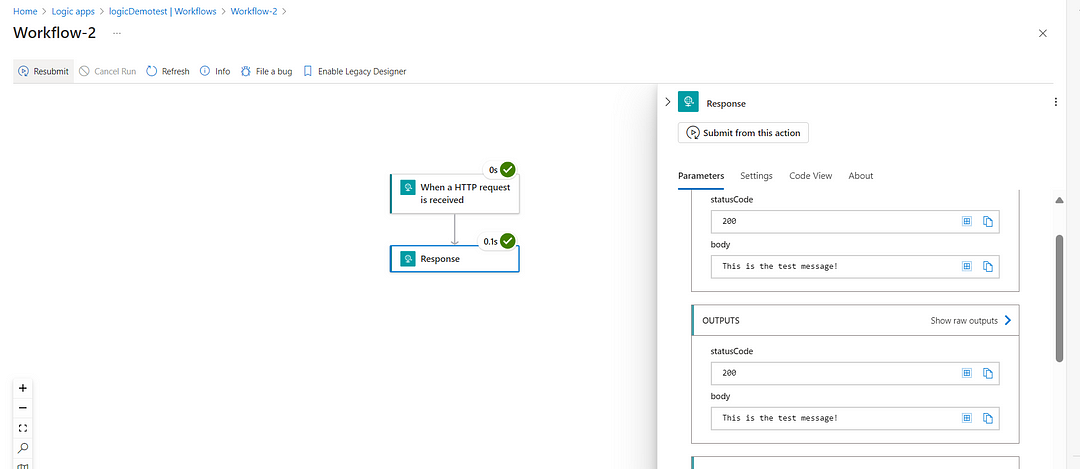
Next, I created ‘Workflow-2’ and started by setting the trigger to ‘When an HTTP request is received’. Then, I added an action called ‘Response’ to return the content received from the HTTP trigger.
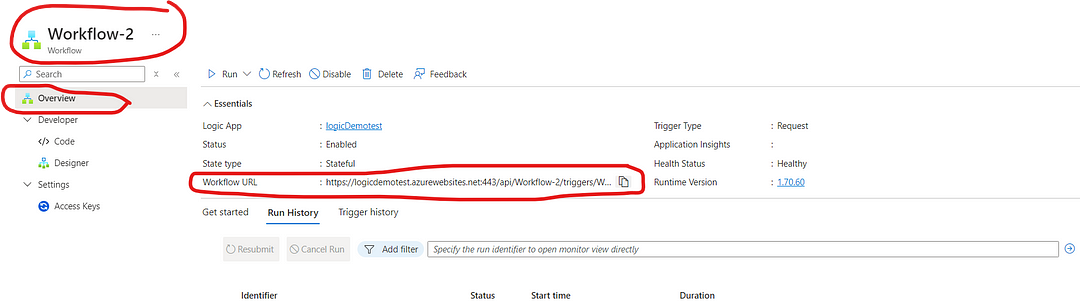
So, I’ve copied the Workflow-2 URL and saved it in a notepad for my own reference.
Now, I moved to Workflow-1 and designed it as follows: in the HTTP action, I specified Workflow-2’s URL, and dynamically selected the HTTP trigger body as the content to be sent from Workflow-1 to Workflow-2.
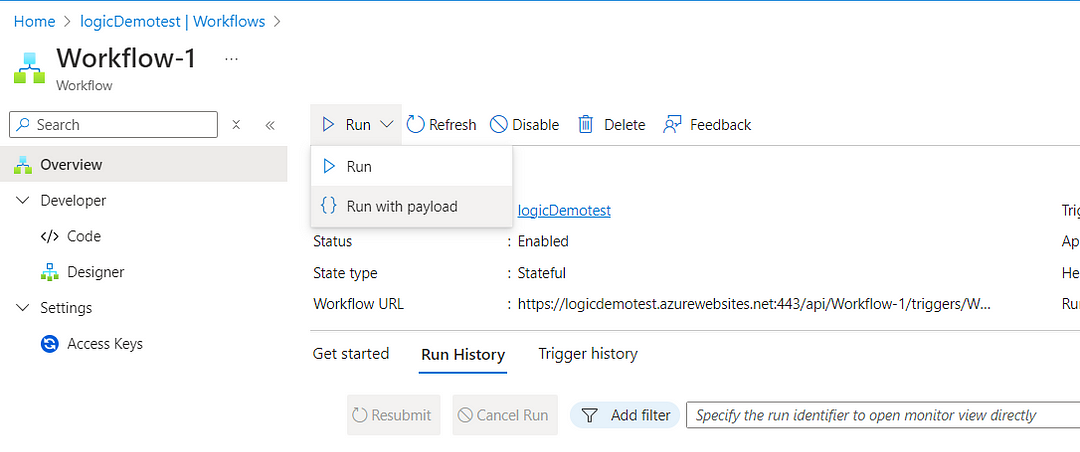
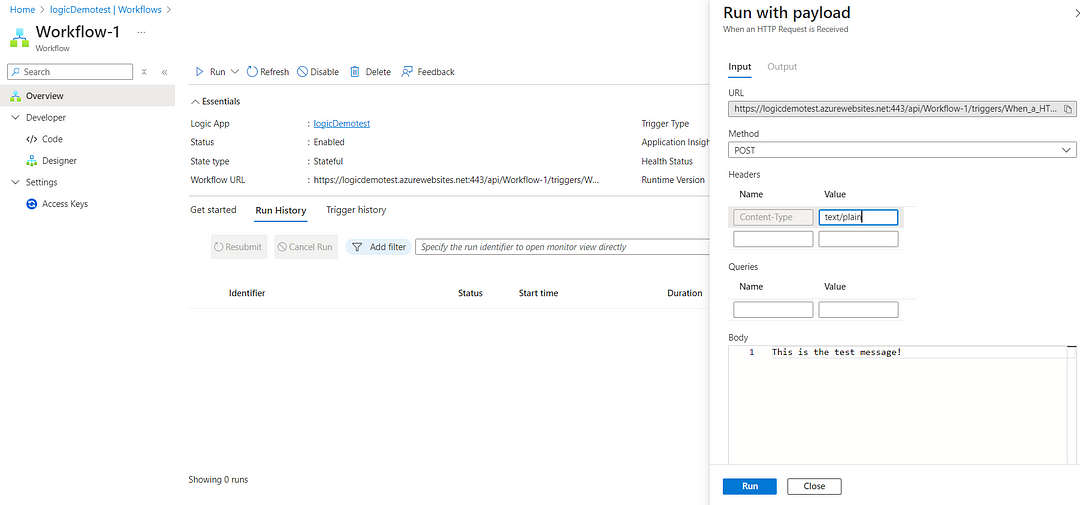
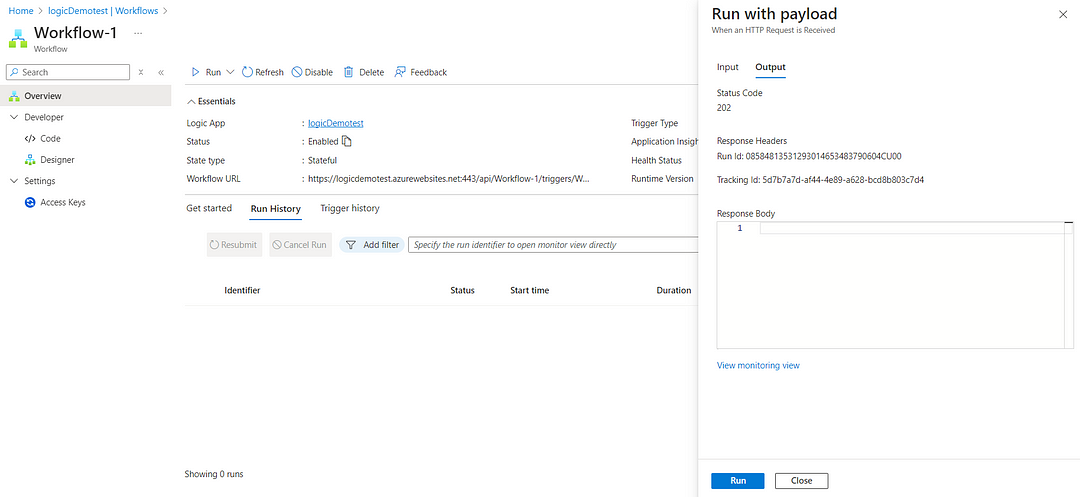
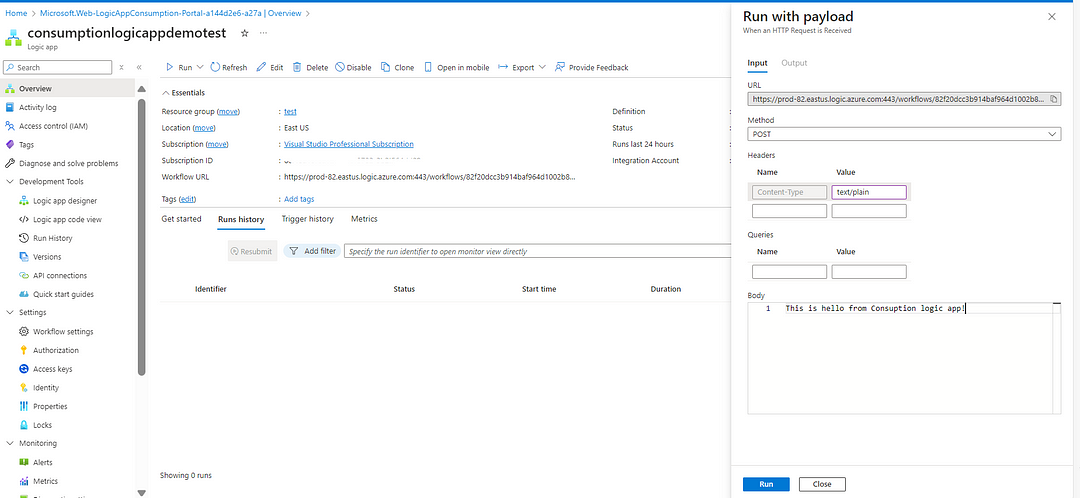
Next, I proceeded to the Overview of Workflow-1 and selected ‘Run with Payload’.” Does that work for you?
Specify the content-type and include the message you wish to send in the body, then select RUN.
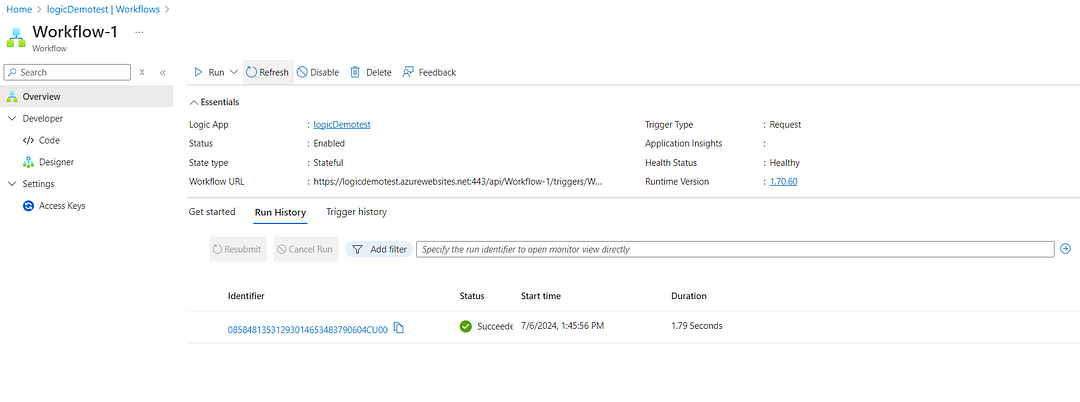
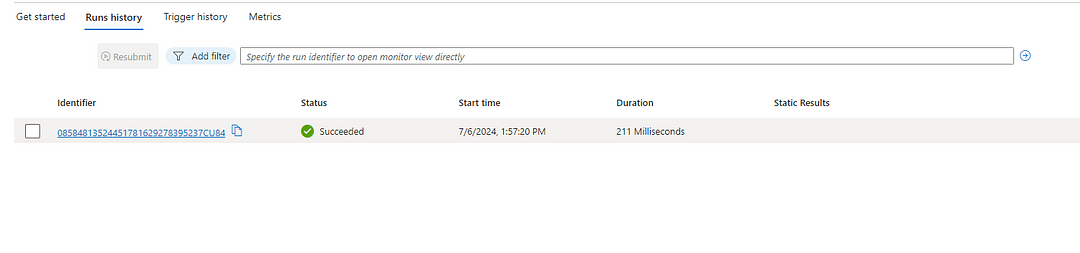
Now we can observe that the transaction was successfully processed in the Logic App ‘workflow-1’.”
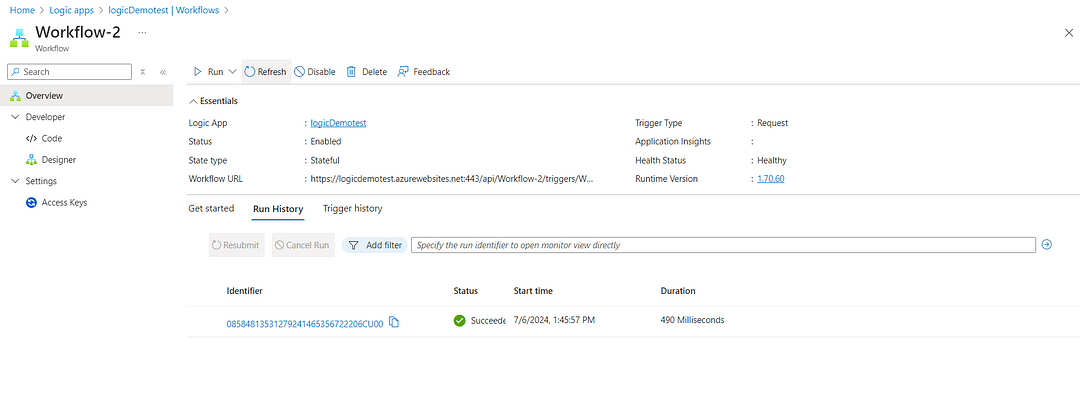
Now, in workflow-2, we can also observe the transaction. To view the desired results, select the run ID of Workflow-2.
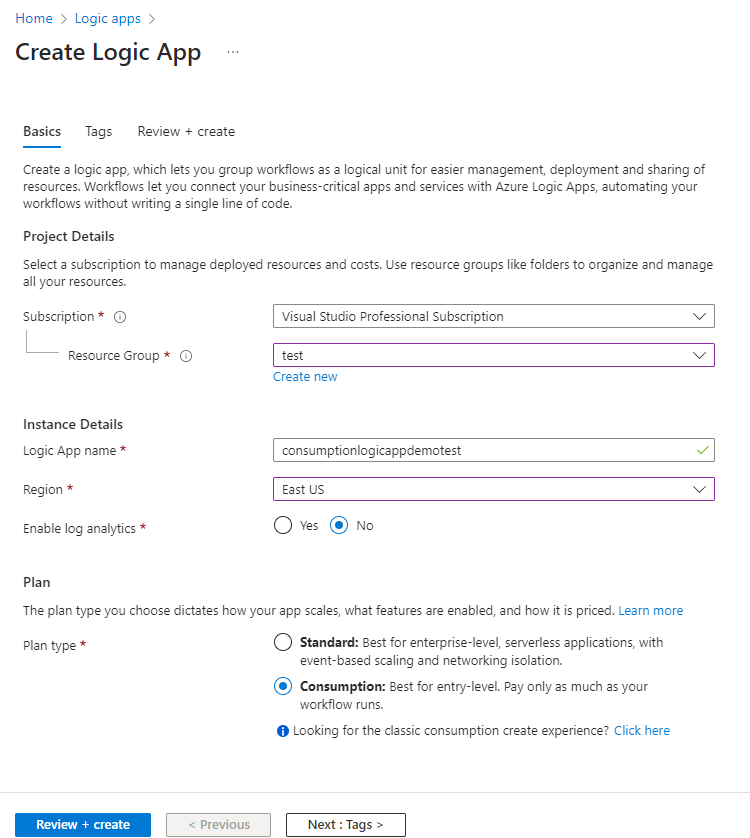
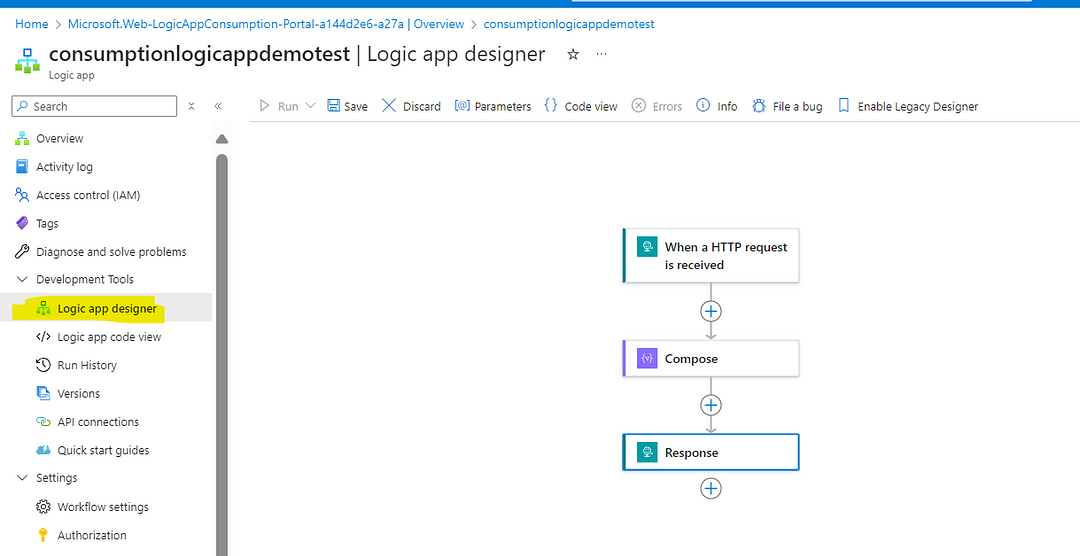
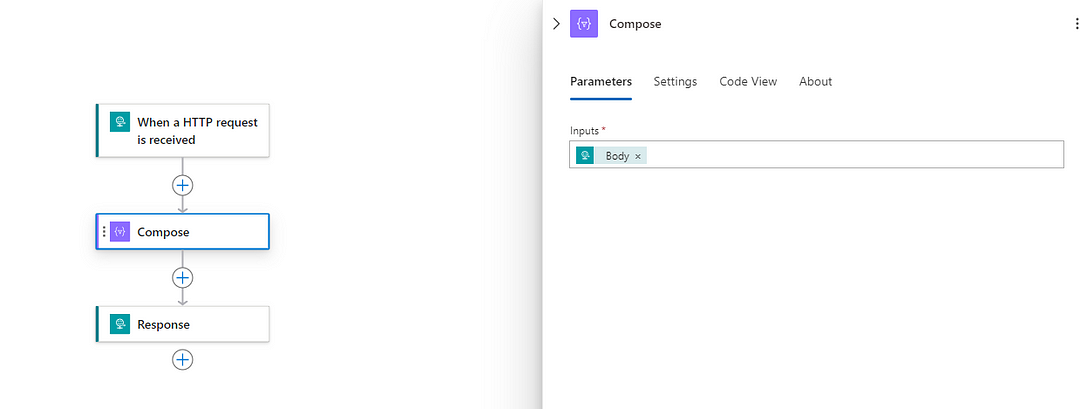
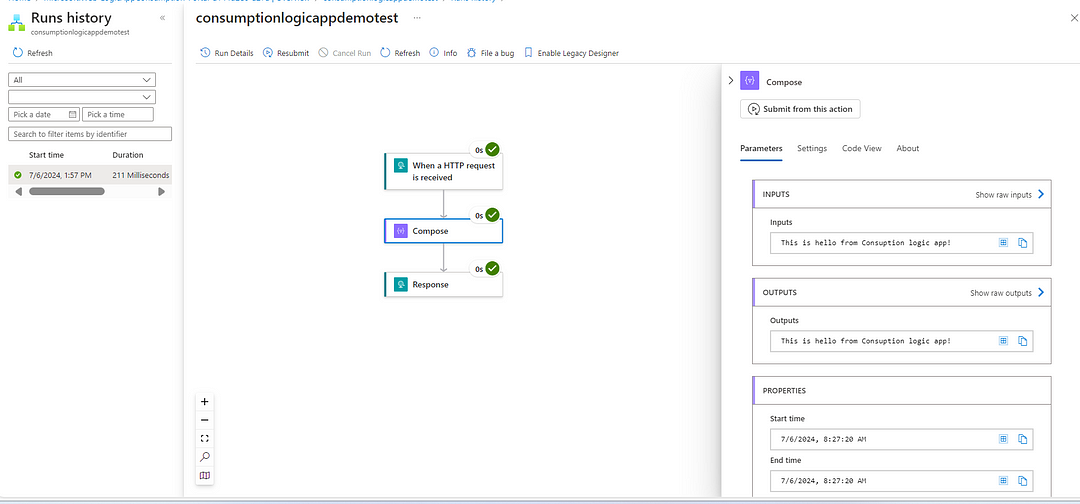
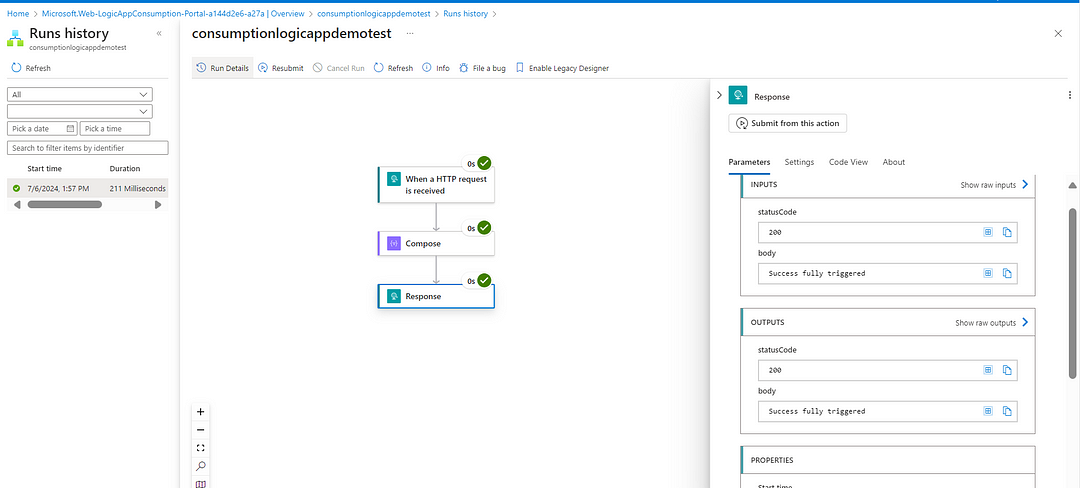
>CONSUMPTION LOGIC APP
In the consumption logic app, fill in all the required details. This consumption logic app does not require an App Service Plan or Storage Account.
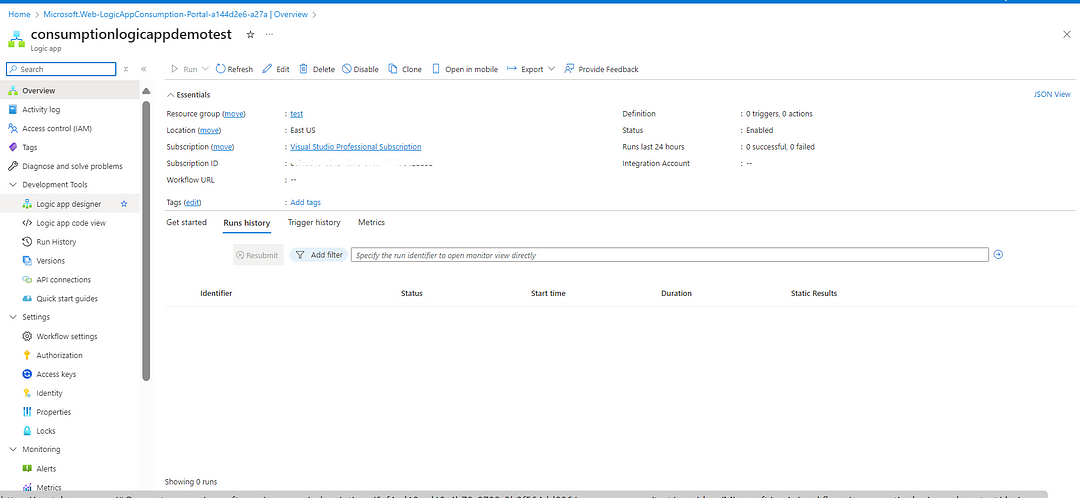
In the Consumption Logic App, we can only create one workflow, unlike the Standard Logic App where multiple workflows can be created.


In this way, we can create both standard and consumption logic apps according to your specific requirements.
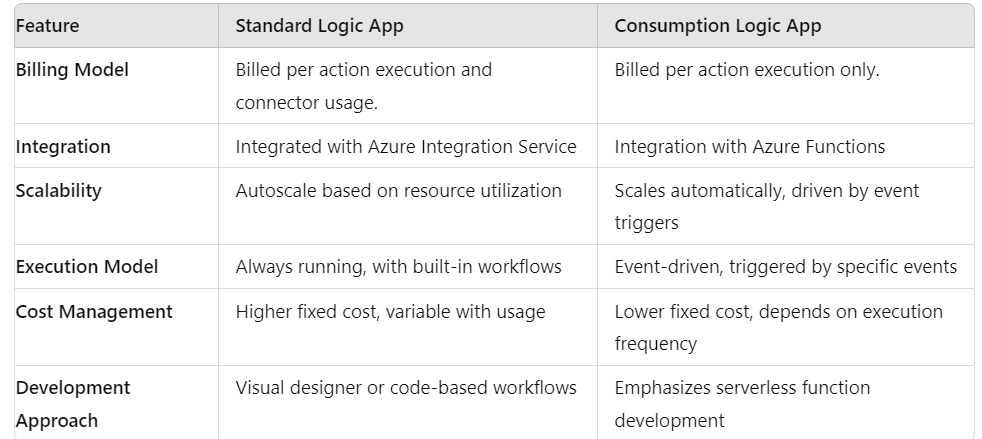
Standard Logic App V/S Consumption Logic App
Thanks for stopping by! Your visit means a lot. Please Follow me😊 Stay tuned for more content. Exciting stuff coming your way soon! 🚀 #StayTuned. Also, visit on RioTech.
Comments
Post a Comment