Let’s create our First Azure Storage account Resource
An Azure Storage Account is like a big box that holds different types of data in Microsoft Azure. It can store things like files, messages, and tables. It’s helpful because it keeps all these storage services organized together. If you delete a storage account, everything inside it will be deleted too.
So let’s just start creating our own storage account in azure.
Step1 . Login to you Azure portal and select your subscription and then select “All services” .
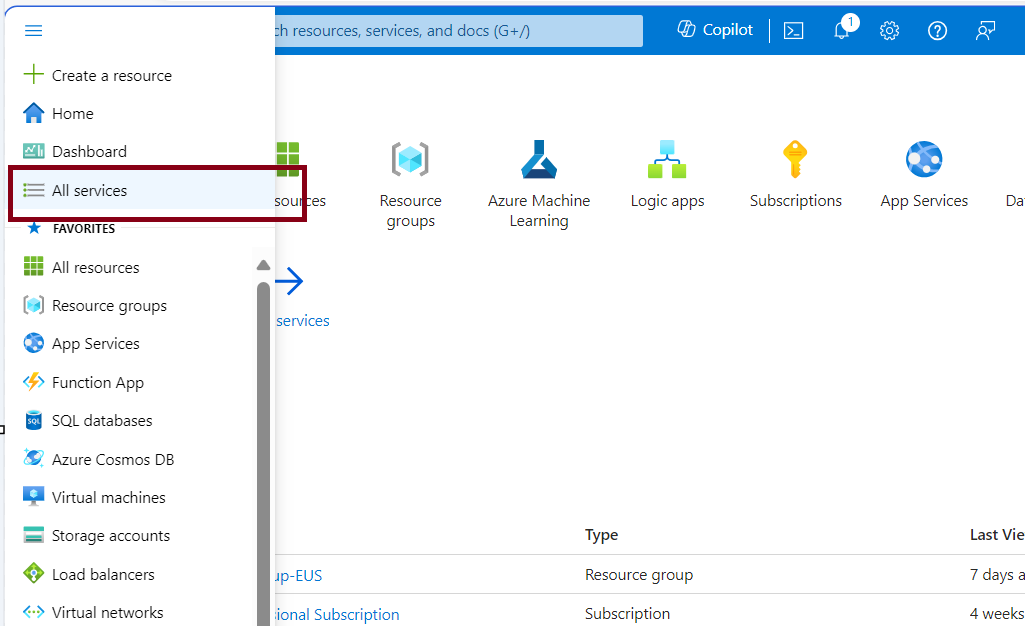
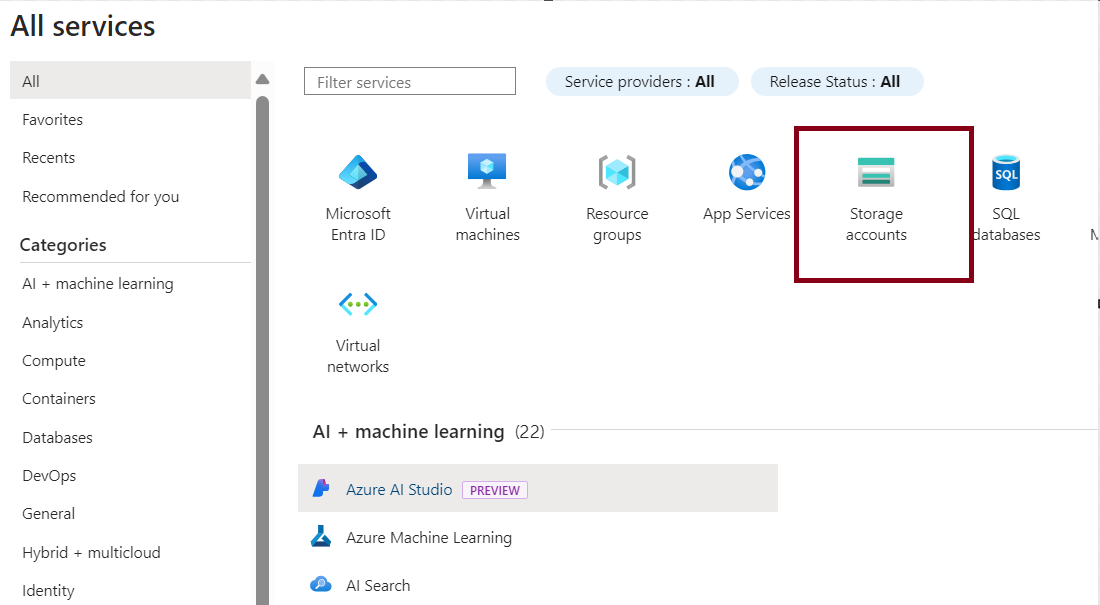
Step2. After selecting “All services” then select “Storage accounts” as mentioned in the pic but if you don’t see the Storage accounts resource end then click on the “Filter services” section and search it with “Storage accounts” and you will see it then click enter.
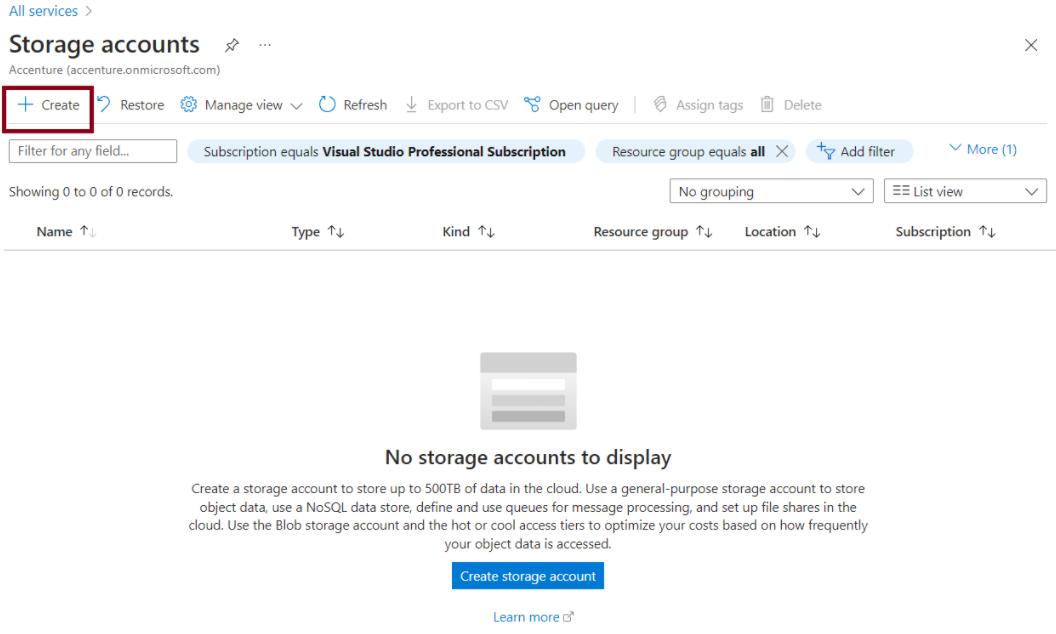
Step3.After the selecting Storage accounts resource click on create button .To create storage account pane will be displayed.
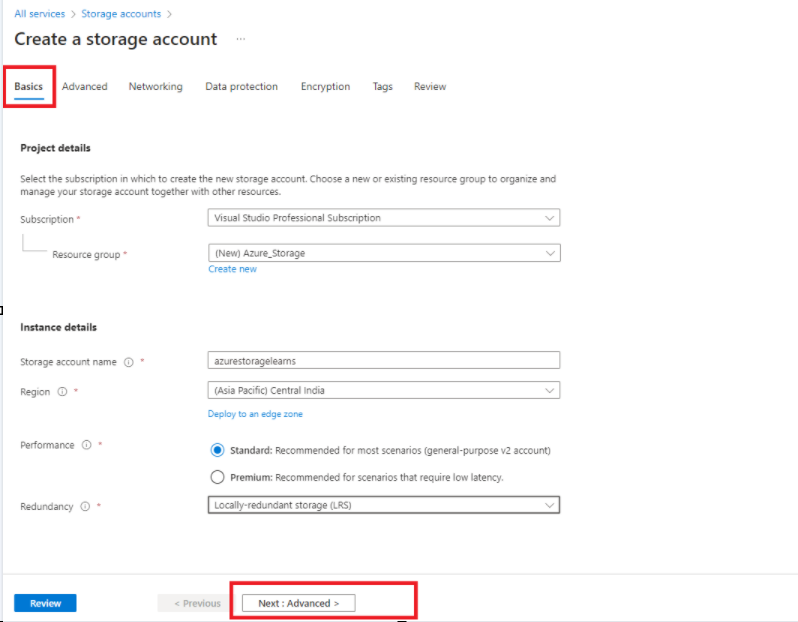
Step4.In the “basics” tab, you need to provide the following information:
- Subscription: Choose the subscription you want to use.
- Resource group: Choose an existing resource group or create a new one.
- Storage account name: Enter a unique name for your storage account.
- Region: Select the location where you want to create the account.
- Performance: Choose either standard or premium based on your needs.
- Redundancy: Select how you want your data to be replicated. For now, choose “Locally-redundant storage (LRS)”.
Step5.In the “Advanced” tab, you need to provide the following information:
- Require secure transfer for REST API operations: This controls whether clients can access data in the storage account using HTTP or only HTTPS. For now, enable HTTPS.
- Enable blob public access: This determines if clients can read data in the blob without any authorization. For now, select yes.
- Enable storage account key access: This allows clients to access data using Shared Access Signatures (SAS). For now, select yes.
- Default to Azure Active Directory authorization in the Azure portal: For now, leave this unchecked.
- Minimum TLS version: Select the most secure version of TLS (Transport Layer Security) which is 1.2.
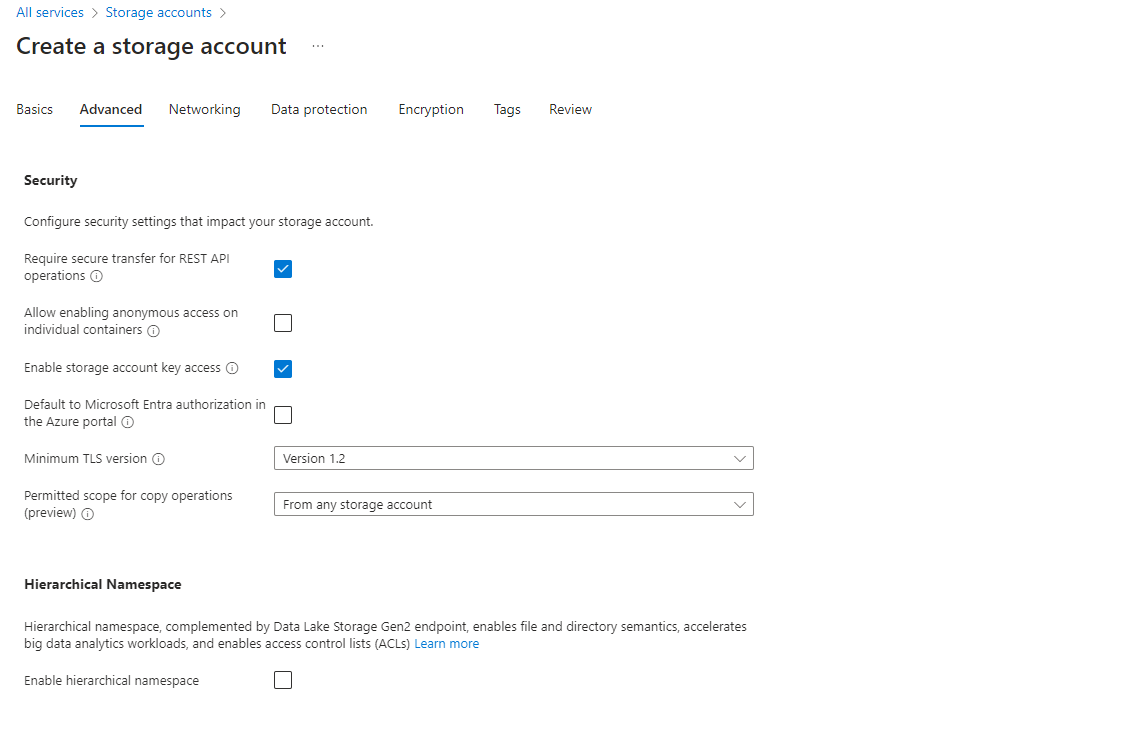
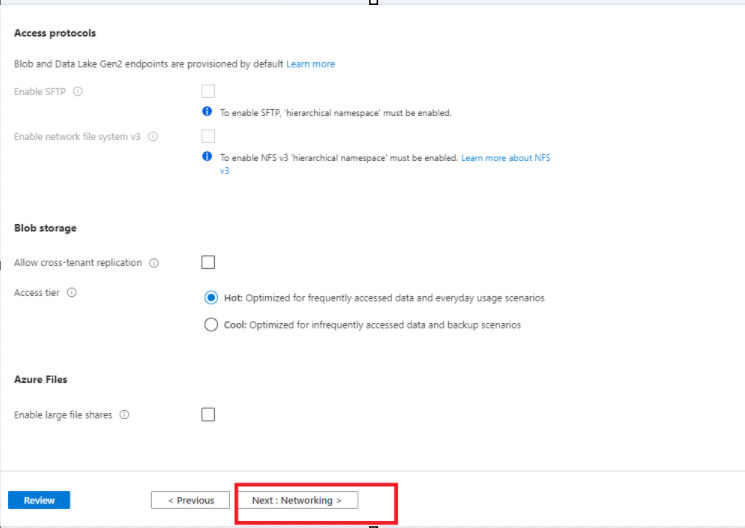
Step6.In the “Advanced” tab, you can also adjust the following settings:
- Enable hierarchical namespace: Used for big-data applications. Uncheck for now.
- Enable SFTP: Keep the default setting unchecked.
- Enable network file share: Keep the default setting unchecked.
- Allow cross-tenant replication: Uncheck for now.
- Access tier: Choose between Hot and Cold tiers. Hot tier is best for frequently accessed data.
- Enable large file shares: Allows storage of up to 100 TiB of files in Azure files. Uncheck for now as it has limitations.
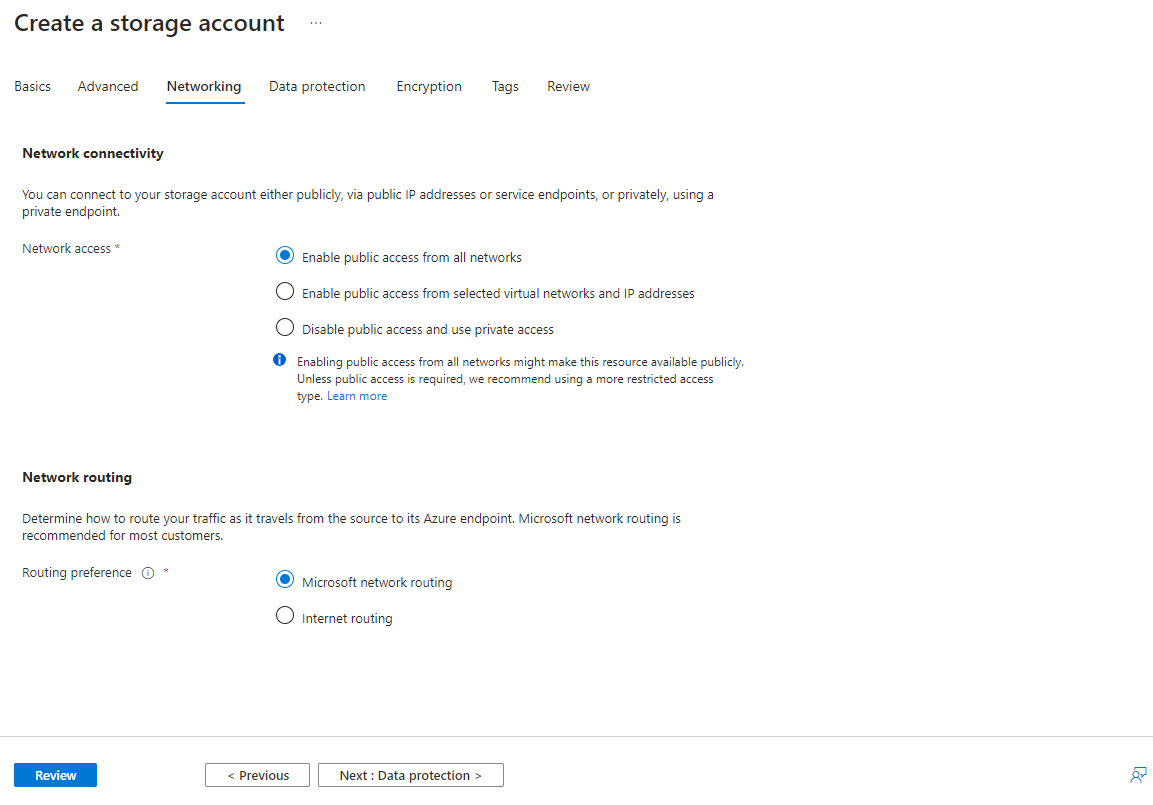
Step7.In the “Networking” tab, you can configure the following details:
- Connectivity method: Choose how you want to connect your store with others. For now, select a public endpoint to allow access over the internet.
- Routing preference: Optimize for low-latency path selection by choosing Microsoft network routing, which utilizes their global network.
Step8.Choose the Next: Data protection option. In the tab enter the following details :
- Enable point-in-time restore for containers: For now, uncheck this option.
- Enable soft delete for blobs: It helps us recover blob data in cases where blobs or blob snapshots are accidentally deleted or overwritten. For now, uncheck this option.
- Enable soft delete for containers: This helps us recover the containers that are accidentally deleted. For now, uncheck.
- Enable soft delete for file shares: This helps us to recover the blob data more easily at the folder level. For now, uncheck.
- Enable versioning for blobs: For now, uncheck this option.
- Enable blob change feed: For now, uncheck this option.
- Enable version-level immutability support: For now, uncheck this option.

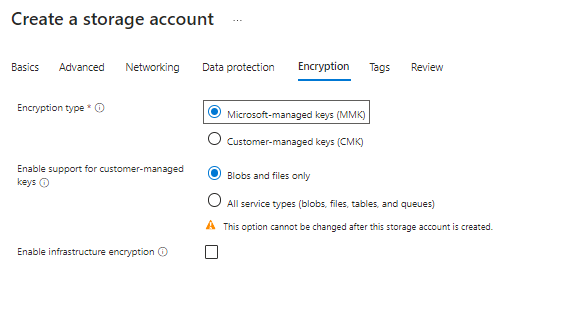
Step9.Choose the Next: Encryption option. In the tab that opens you may configure encryption settings. For now, leave it to default.
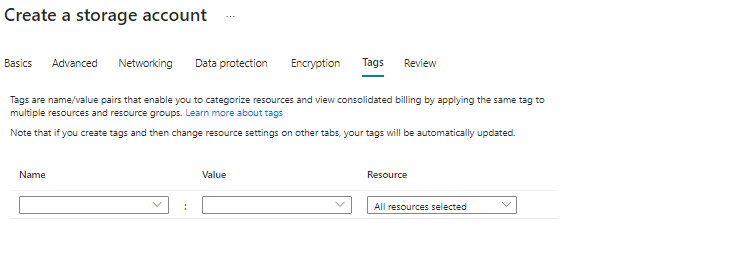
Step10. For now keep the Tags section as empty and go to Review section.
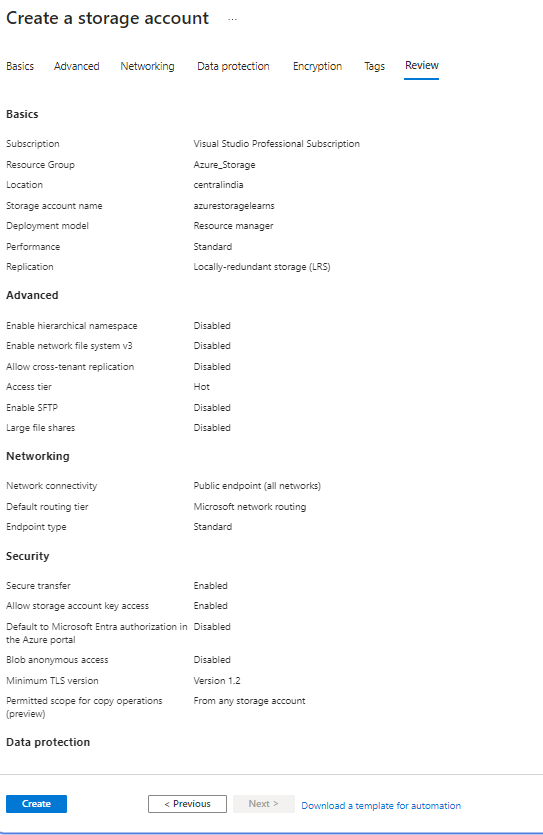
Step11. So as we can see here its giving us the summary of details which we selected for creating Storage sccount. Now select “Create”.
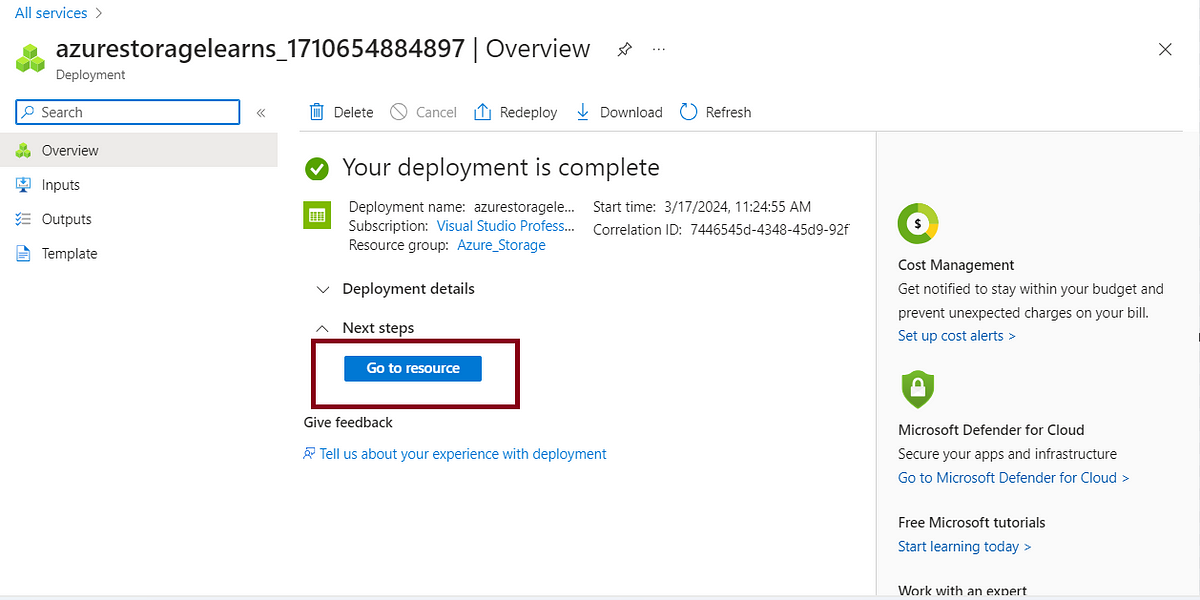
Step12. Now it will take some time for deploy. After deployment select “Go to resource”.
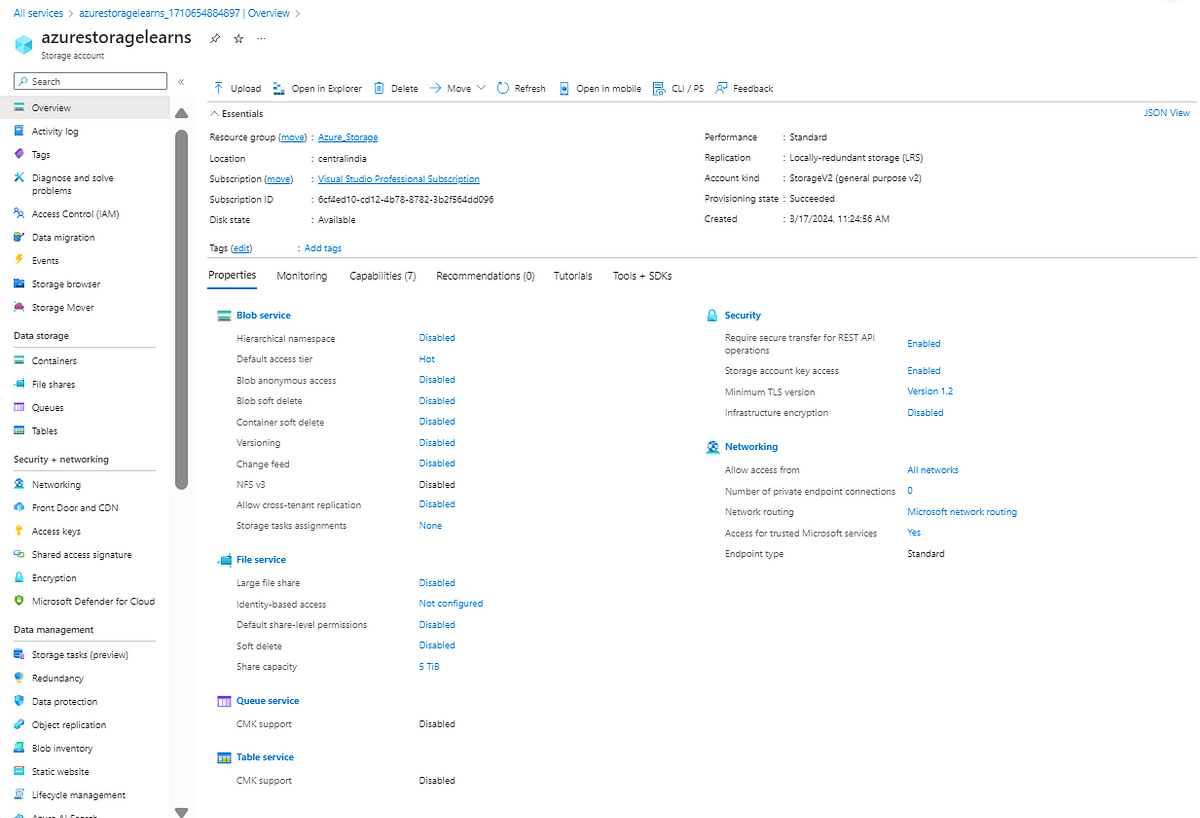
Step13. Now finally, you have created your own Azure storage resource. Yiu can now view your resources.
Comments
Post a Comment