Hi!👋😁, Let’s see today how we can implement .NET custom code in the standard logic app in VS code.

Prerequisites:
- VS code and free Azure subscription
- Dotnet SDK
- Install Azure extension and Logic app standard extension in VS code.
Create a Logic app workspace:
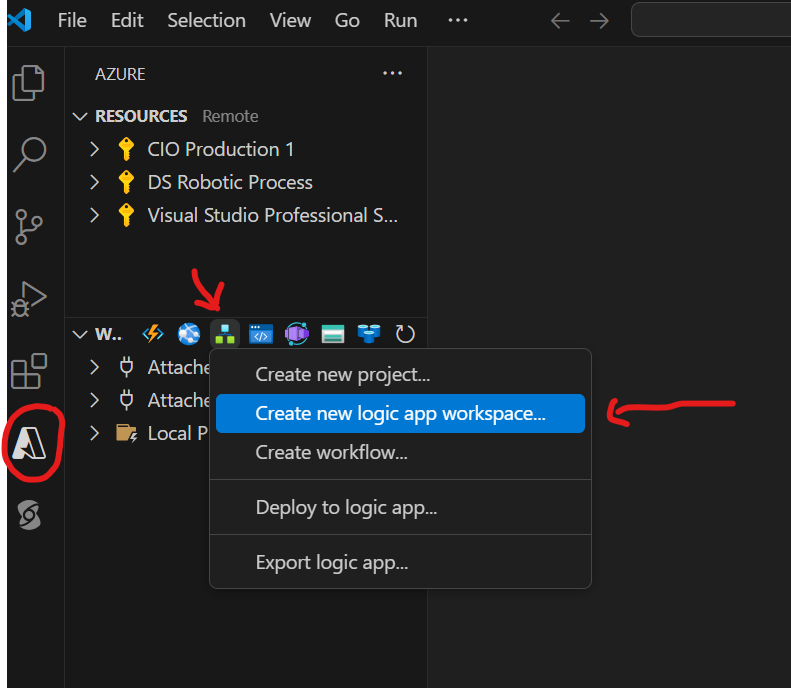
Now select the folder in which you want to create the project. Choose “Logic app with custom code project” as a project template

Choose the target Framework as “.NET 8”

Now provide some following values:
- Function name for your code project
- A Namespace for your custom code
- Workflow template for your first workflow (Stateful or Stateless)
- A name for a workflow
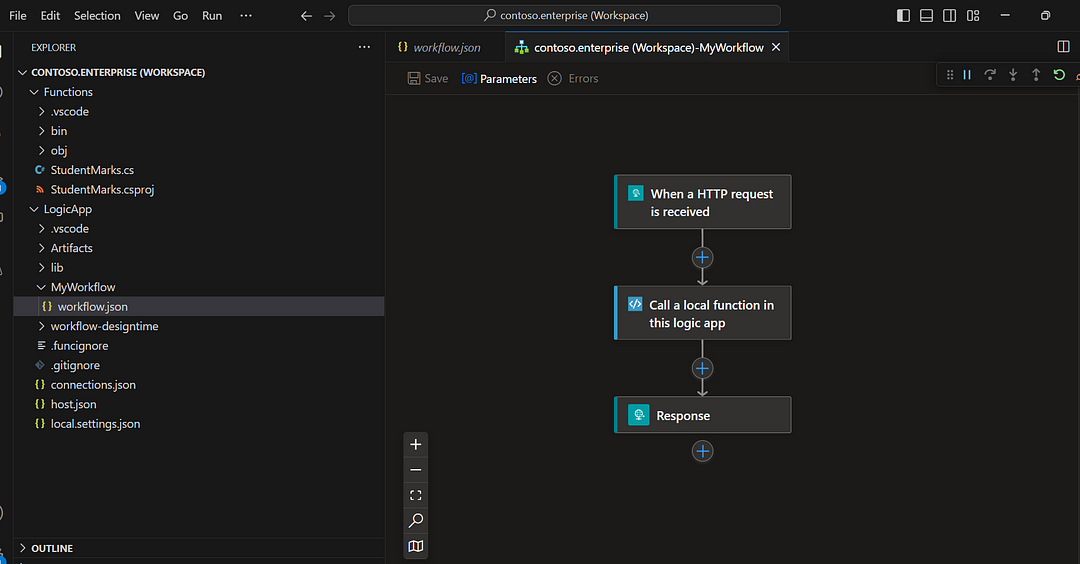
Once you have completed, should see the following folder/file structure:
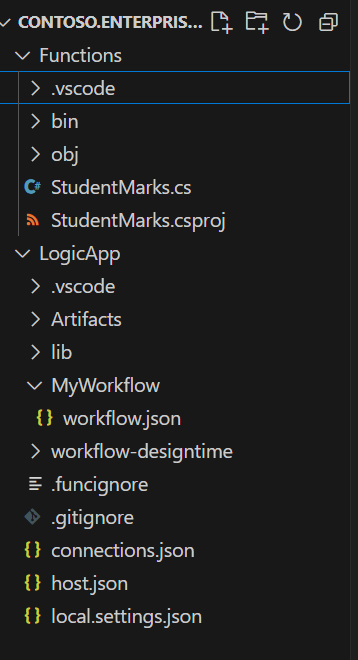
So, StudentMarks.cs is my function code which will calculate the Total Marks and Percentile of each student.
below is my code :
//------------------------------------------------------------
// Copyright (c) Microsoft Corporation. All rights reserved.
//------------------------------------------------------------

namespace student.enterprise
{
    using System;
    using System.Collections.Generic;
    using System.Linq;
    using System.Threading.Tasks;
    using Microsoft.Azure.Functions.Extensions.Workflows;
    using Microsoft.Azure.Functions.Worker;
    using Microsoft.Extensions.Logging;

    /// <summary>
    /// Represents the StudentMarks flow invoked function.
    /// </summary>
    public class StudentMarks
    {
        private readonly ILogger<StudentMarks> logger;

        public StudentMarks(ILoggerFactory loggerFactory)
        {
            logger = loggerFactory.CreateLogger<StudentMarks>();
        }

        /// <summary>
        /// Executes the logic app workflow to calculate student marks and percentile.
        /// </summary>
        /// <param name="studentId">The student ID.</param>
        /// <param name="marks">The list of marks obtained by the student.</param>
        [Function("StudentMarks")]
        public Task<MarksResult> Run([WorkflowActionTrigger] int studentId, List<int> marks)
        {
            this.logger.LogInformation($"Calculating marks for Student ID: {studentId}");

            // Aggregate the total marks
            int totalMarks = marks.Sum();
            int maxMarks = marks.Count * 100; // Assuming each subject has a maximum of 100 marks

            // Calculate the percentage
            double percentage = (double)totalMarks / maxMarks * 100;

            // Calculate the percentile (dummy logic here, replace with actual percentile calculation)
            double percentile = CalculatePercentile(percentage);

            // Create a MarksResult object with the calculation details
            var result = new MarksResult()
            {
                StudentId = studentId,
                TotalMarks = totalMarks,
                Percentage = percentage,
                Percentile = percentile
            };

            return Task.FromResult(result);
        }

        /// <summary>
        /// Dummy method to calculate the percentile based on percentage.
        /// Replace this with actual percentile calculation logic.
        /// </summary>
        /// <param name="percentage">The student's percentage.</param>
        /// <returns>The calculated percentile.</returns>
        private double CalculatePercentile(double percentage)
        {
            // Replace this with actual percentile calculation logic
            return percentage > 90 ? 95 : (percentage > 75 ? 85 : 70);
        }

        /// <summary>
        /// Represents the marks result for a student.
        /// </summary>
        public class MarksResult
        {
            /// <summary>
            /// Gets or sets the student ID.
            /// </summary>
            public int StudentId { get; set; }

            /// <summary>
            /// Gets or sets the total marks obtained by the student.
            /// </summary>
            public int TotalMarks { get; set; }

            /// <summary>
            /// Gets or sets the percentage of the total marks.
            /// </summary>
            public double Percentage { get; set; }

            /// <summary>
            /// Gets or sets the percentile based on the percentage.
            /// </summary>
            public double Percentile { get; set; }
        }
    }
}
First, we have to build our Function project


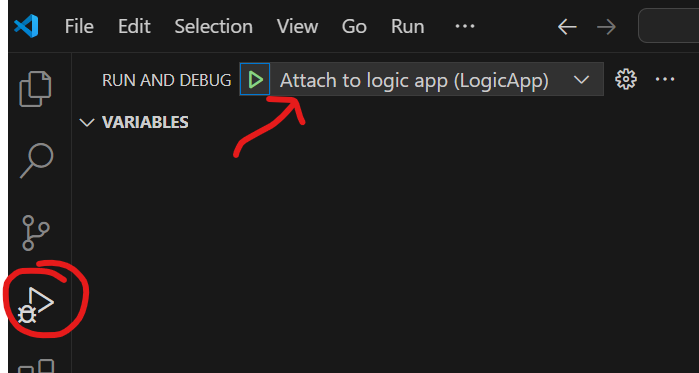
Once the build is succeded, now we need to debug the Logic app as well
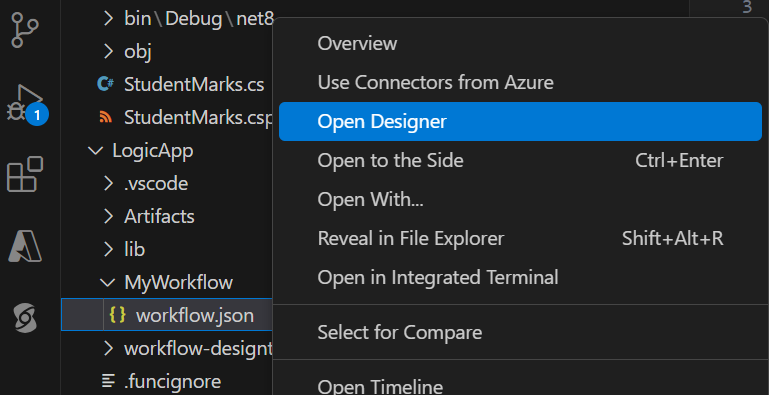
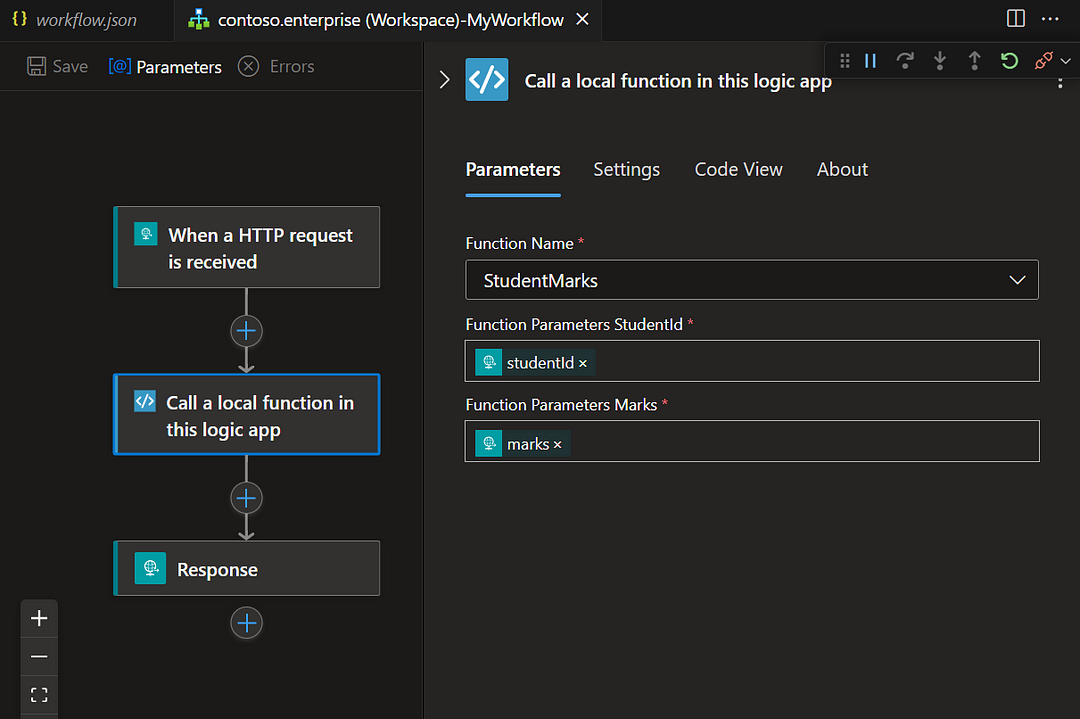
Once the debug is successful, then go to workflow.json and right click and select “open designer”.
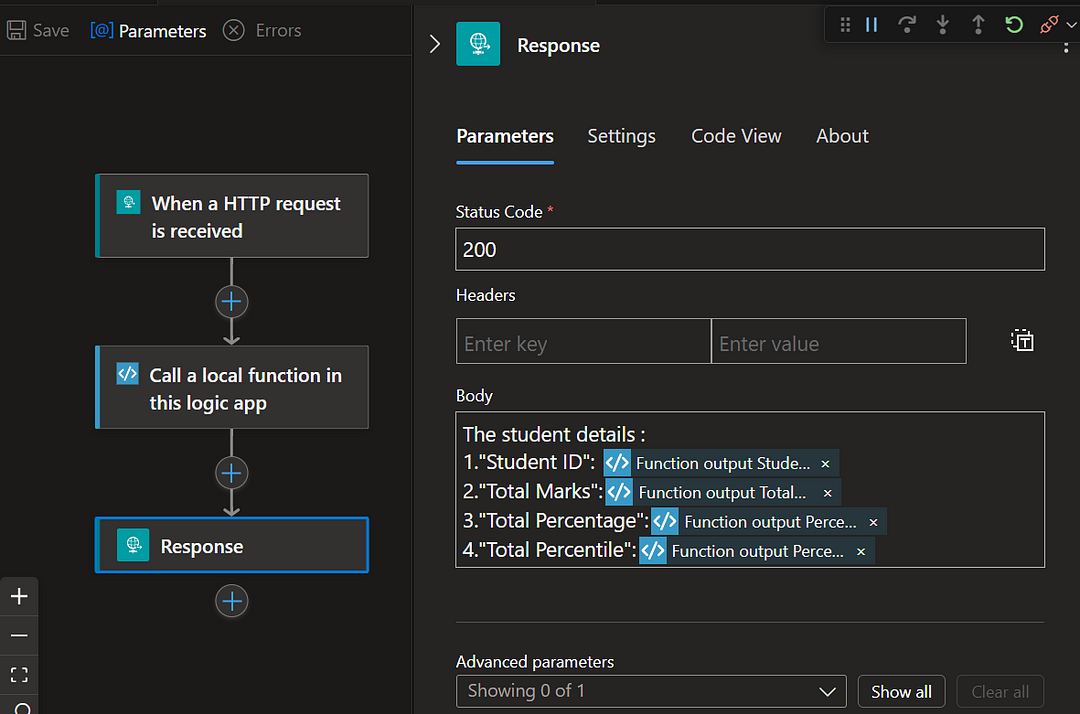
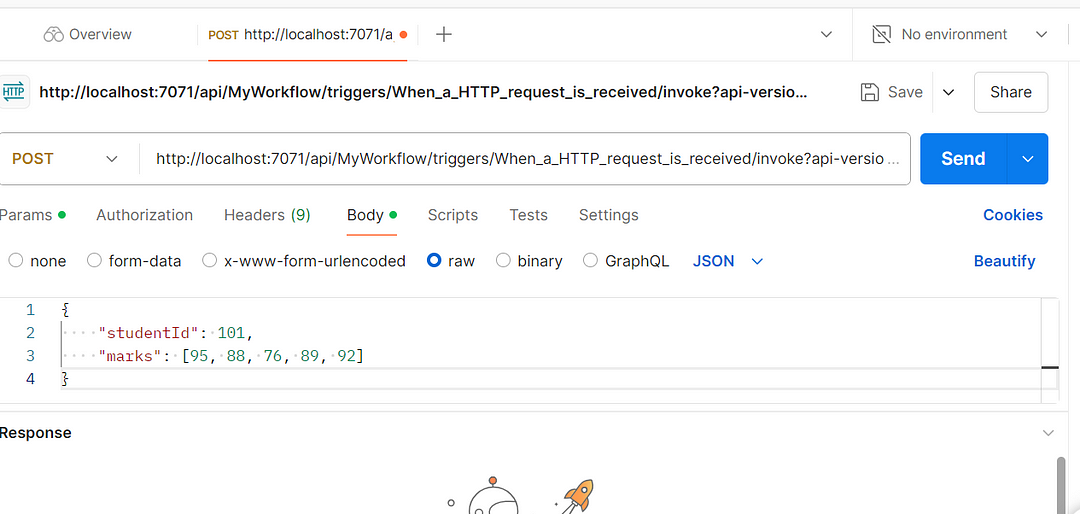
According to my data, I am giving input parameters : “StudentID”as string and “Marks” as a array list.

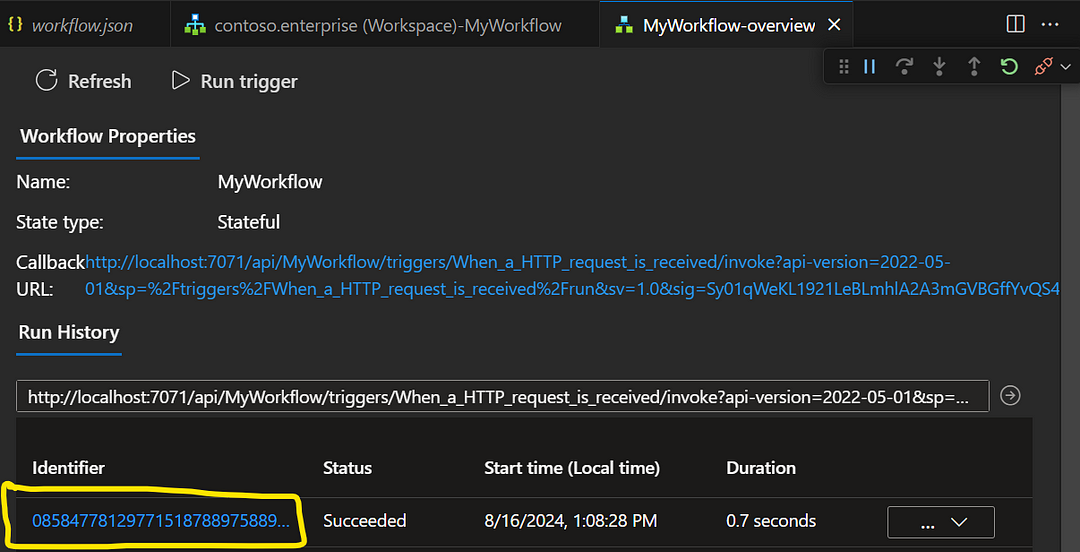
Save your designed workflow and go to overview of the workflow and copy the url.

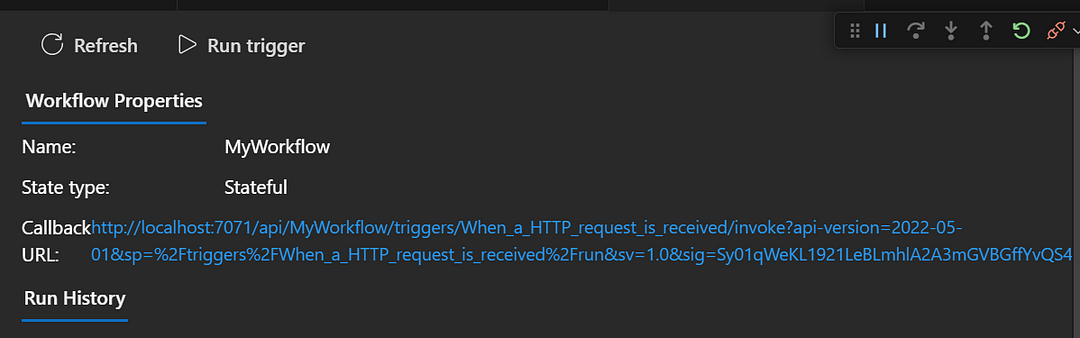
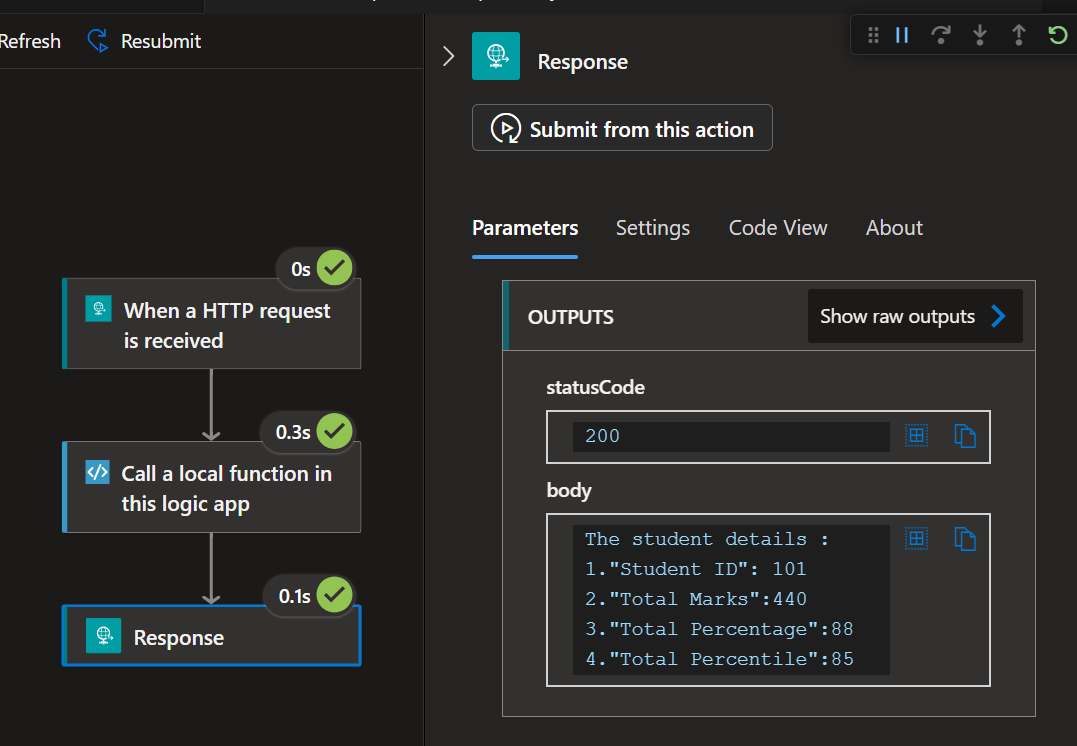
Please click on the latest transaction ID to view the output based on your code implementation. In my case, the result is displayed as expected.
Thanks for stopping by! Your visit means a lot. Please Follow me😊 Stay tuned for more content. Exciting stuff coming your way soon! 🚀 #StayTuned. Also, visit on RioTech.
Comments
Post a Comment